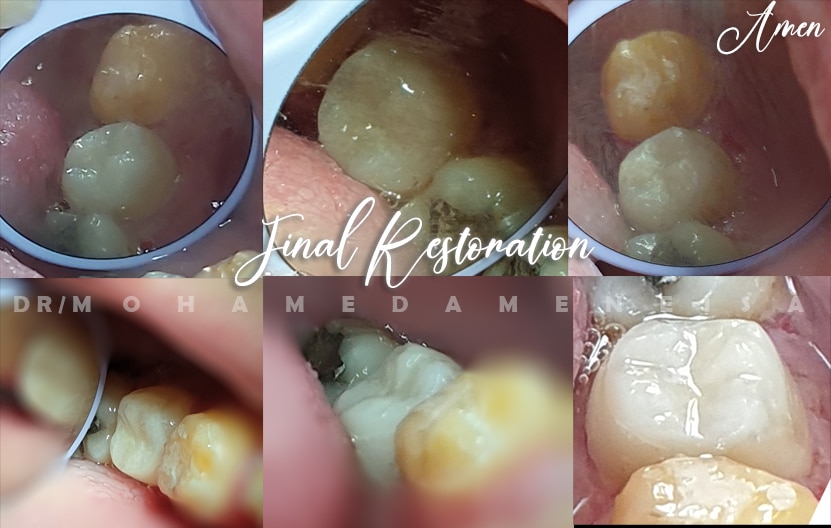
Journey from loss to existence, Indirect Composite ONLAY Restoration, details, steps, techniques are below each photo (educational & Practical case)
Mobile Photography

Chief complain:
- “I feel Pain in Lower Left side while chewing”
Pre-Operative Situation & Examination:
By examination the LL side I found:
- Old defective amalgam restoration represent in lower left 2nd molar, by asking the patient; there was no history of pain with cold or warm water
- LL 4 and LL 6 was prepared for fixed prosthodontics from about 2 years ago, so the distal wall of LL6 is absent, causing a large contact area between distal of 6 and mesial of 7, which good food accumulation environment, causing pain and distress to patient
- No sign of irreversible pulpitis in any tooth in this quadrant.
Examination of LL7:
- Aggressive loss of tooth structure.
- Large crack between buccal cusps.
Management:
- Because the LL7 is the source of pain, I decide to Remove old amalgam restoration first and replace it by composite restoration.
- regarding the fixed prosthodontics, patient looking for replace old restoration first, then we will restore 4 and 6 by fixed prosthodontics
- rubber dam application to remove the amalgam safely to the patient, then starting the procedure.

- Amalgam, Caries and crack were removed
- Soft caries checked by excavator >> no remaining soft caries
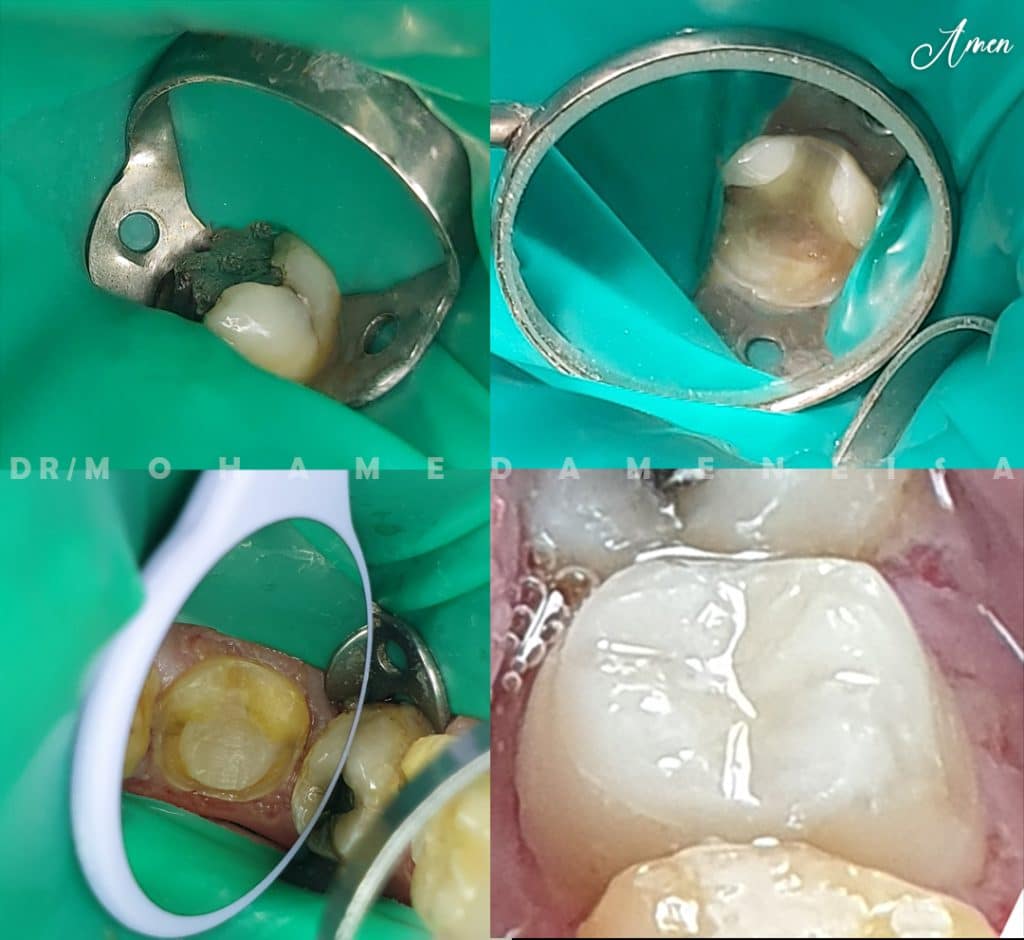
- After removing the old restoration, the remaining structure showed unsupported buccal Cusps
- Here, the decision was to do cuspal coverage restoration

- Reduction of buccal cusps 2mm to remove unsupported tooth structure to achieve healthy supported enamel
- roundation of internal corners and bevel to improve mechanical resistance

- Applying of 2 layers of BISCO bond UNIVERSAL, then application of 0.5 flowable composite (Nexcomp META Flow) on the fresh cutting dentin surface.
- The resin coating is applied on the cut surfaces after tooth preparation by dentine bonding system and a flowable composite.
- Resin coating step necessary specially if exposed dentine area is wide
- it is isolate the dentinal substrate from bacterial, environmental and thermal situation that may occur, also it protects pulp and improves bond strength and reduce sensitivity.
Technique with UNIVERSAL BOND BISCO:
1- bond brushing with agitation 20 sec
2- gentile air blowing 5 sec
3- curing
Repeat the procedure to apply 2 layers

- Application of thin composite film (Herculite XRV Ultra KERR composite) to block undercuts to be ready to receive the indirect restoration
- the block out of the undercuts filling the areas in which the indirect restoration would not find a favorable morphology to the substrate, this allows for a conservative preparation, given that some areas that determine the undercut do not need to physically removed as they filled with the restorative material of the buildup.
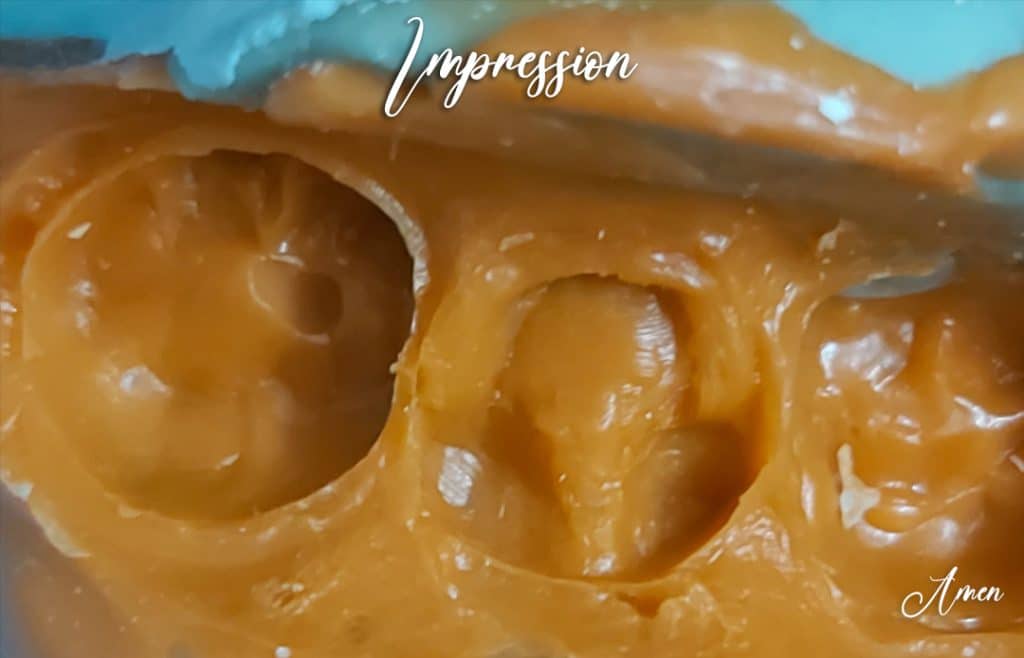
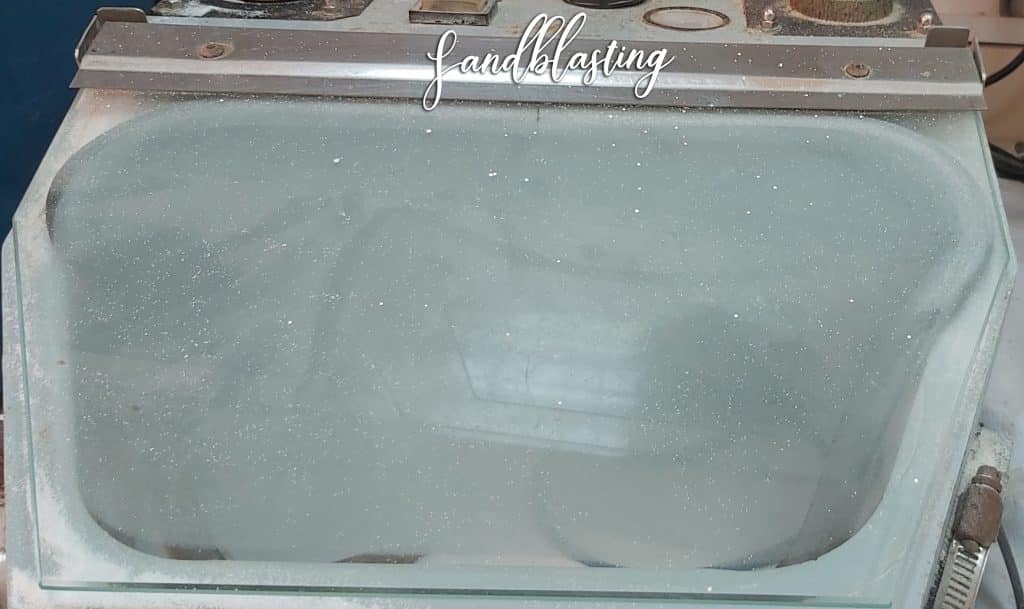
- Impression by ZERMACHK ZETA PLUS Impression Material (Putty-Catalyst-light)

- First, I tried by placing a tofflemire matrix band, but there is no contour and large MD dimension, so I used a saddle matrix with matrix clip, Wedges used to confirm the marginal adaptation
- Starting build up from Finish line area, till reaching the pulpal floor, then a composite layer applied to the floor equal to the finish line bullied up, then cusp by cusp build up started by buccal cusps followed by lingual one

Composite used:
Herculite XRV Ultra KERR composite


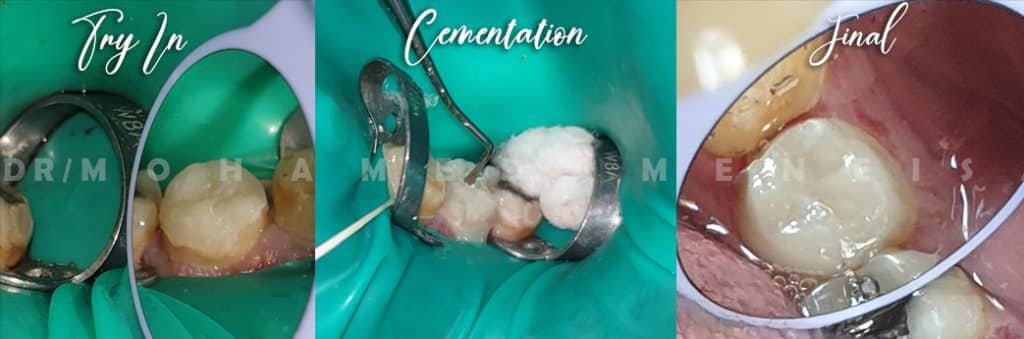
Etching by META ETCHANT (37% phosphoric acid etching gel).

Application of 2 layers of BISCO bond UNIVERSAL with same technique mentioned previously.
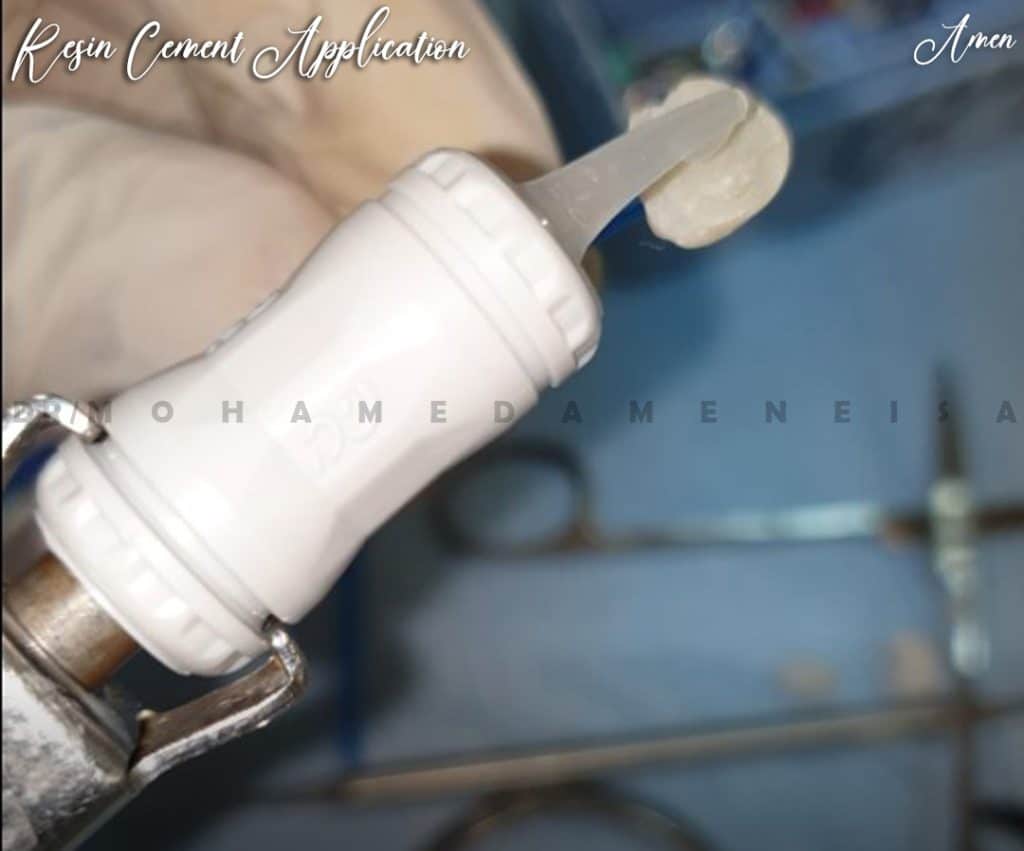
Application of Resin, Self adhesive Cement (G-CEM Capsule) on the inner surface of restoration.
G-CEM Capsule is a self-adhesive resin cement that features an advanced formulation that offers unparalleled self-adhesive properties that seal and protect the tooth. This helps to eliminate sensitivity, whether the prep is moist or dry. This natural complement to the tooth surface means you'll be able to quickly and efficiently handle a variety of restorations with better results.