Minimally invasive posterior composite restoration with predictable proximal contact
Abstract
A predictable posterior composite restoration depends on isolation, conservative caries removal, stress-controlled layering, and a matrix strategy that recreates tight proximal contact and correct emergence profile. This step-by-step case shows a rubber-dam–based workflow using a pre-wedged sectional matrix approach and incremental composite layering to achieve an anatomical, polished restoration with a clean post-op radiographic result. Evidence supports the long-term success of posterior resin composites when adhesive protocols and proximal contact management are properly executed.
1) Pre-op assessment and goals
Clinical goals
- Absolute isolation and contamination control
- Conservative removal of infected dentin while preserving enamel and sound dentin
- Rebuild an anatomical proximal wall first (contact + emergence), then sculpt occlusal anatomy
- Finish and polish to a plaque-resistant surface with stable occlusion
Why this matters
Posterior resin composite restorations show good clinical longevity, but failures increase when isolation is compromised, contacts are open, or margins are poorly finished.
Images to place
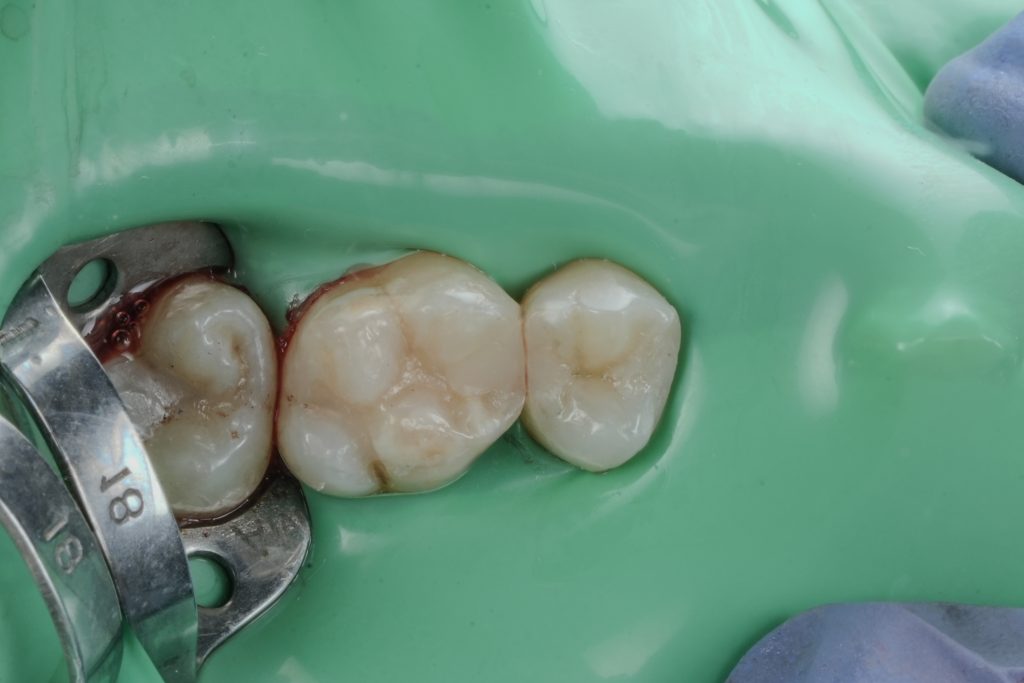
- Fig. 1: Pre-op occlusal view (caries/defect visible).
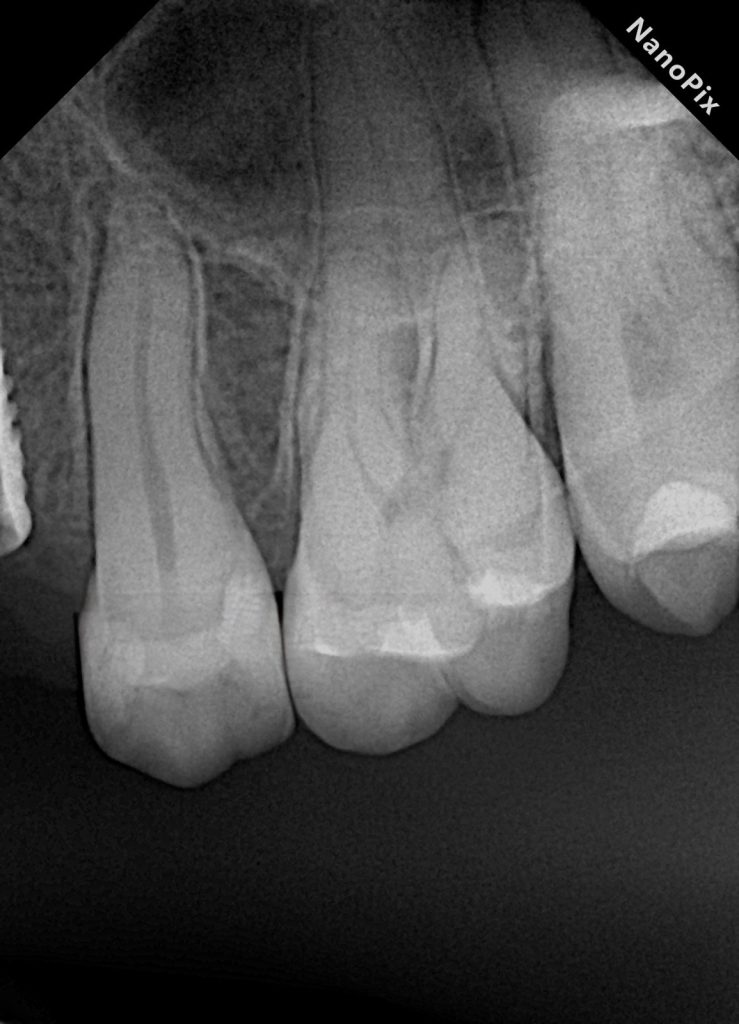
- Fig. 2: Pre-op bitewing / periapical (baseline).
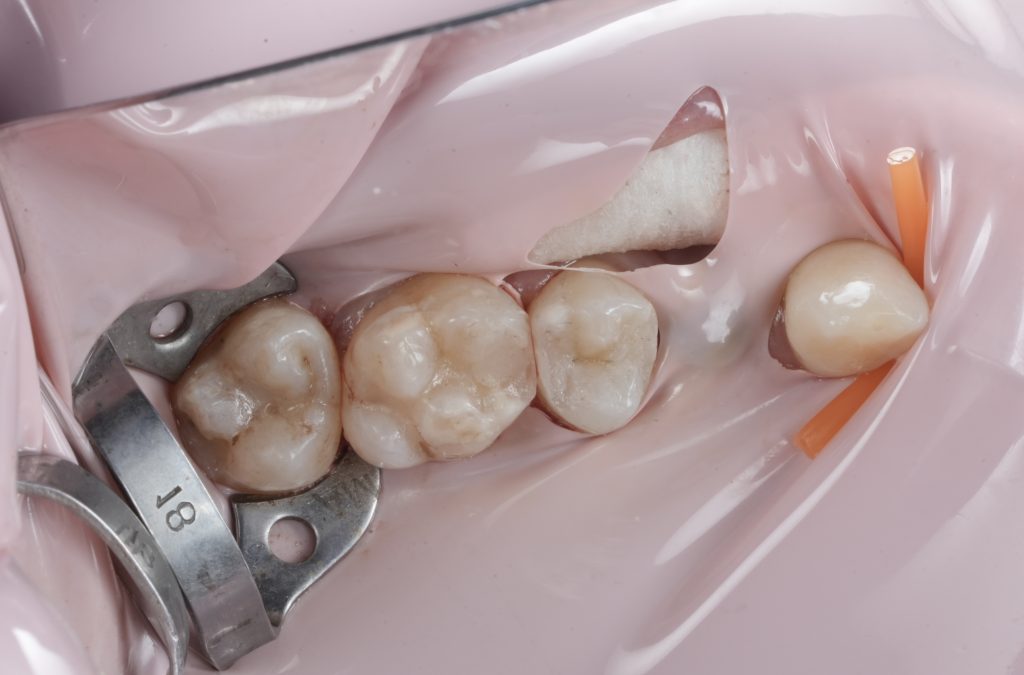
2) Isolation and field control
Step 1: Rubber dam placement
- Select clamp for stable retention (premolar/molar clamp depending on tooth morphology).
- Invert dam around cervical margins for a dry working field.
- Place floss ligatures if needed for tighter cervical seal.
Clinical tip
If you can’t keep the gingival margin completely dry, don’t start bonding. Fix isolation first (re-invert, add teflon/floss ligature, or adjust clamp). Marginal contamination is one of the fastest ways to lose longevity.
Images to place
- Fig. 3: Rubber dam isolation (wide view).
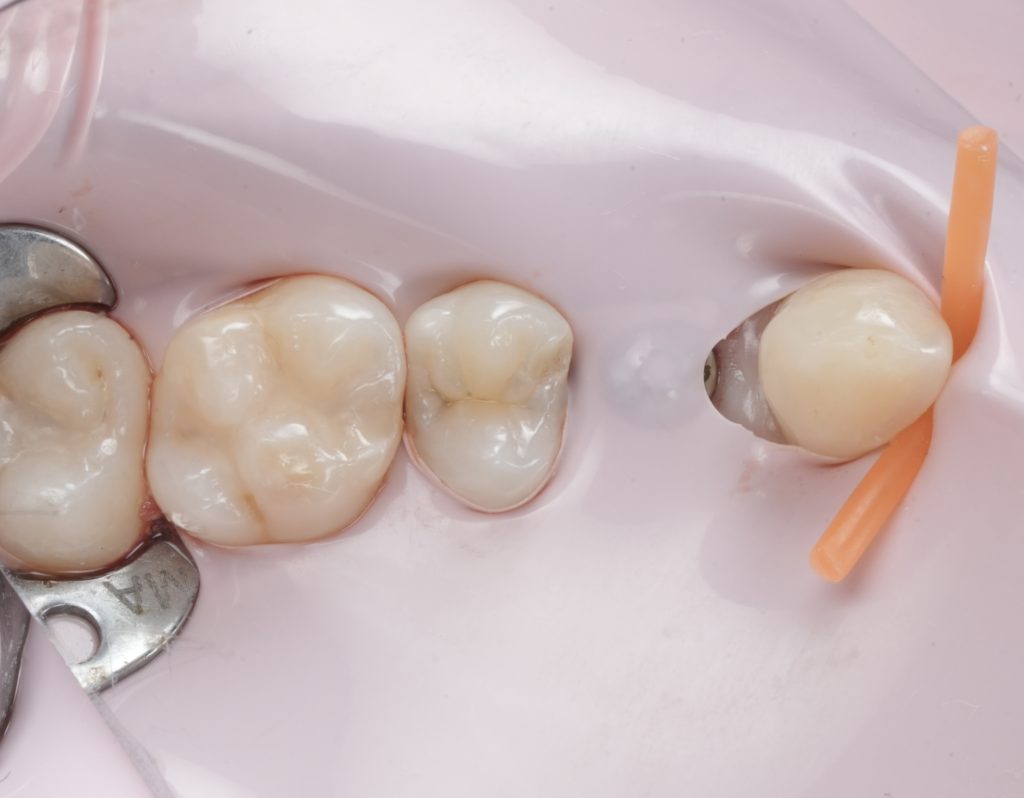
3) Pre-wedging and separation (before cutting)
Step 2: Pre-wedge the proximal area
- Insert a wooden/plastic wedge before preparation.
- Purpose: protects the adjacent tooth, slightly separates teeth, and helps control gingival fluids.
Step 3: Optional separation ring trial
- If using a sectional matrix, trial-fit the ring early to ensure it seats properly.
Why this matters
Matrix selection and separation influence proximal contact tightness and contour in Class II composites.
Images to place
- Fig. 4: Pre-wedge / separation setup (before prep).
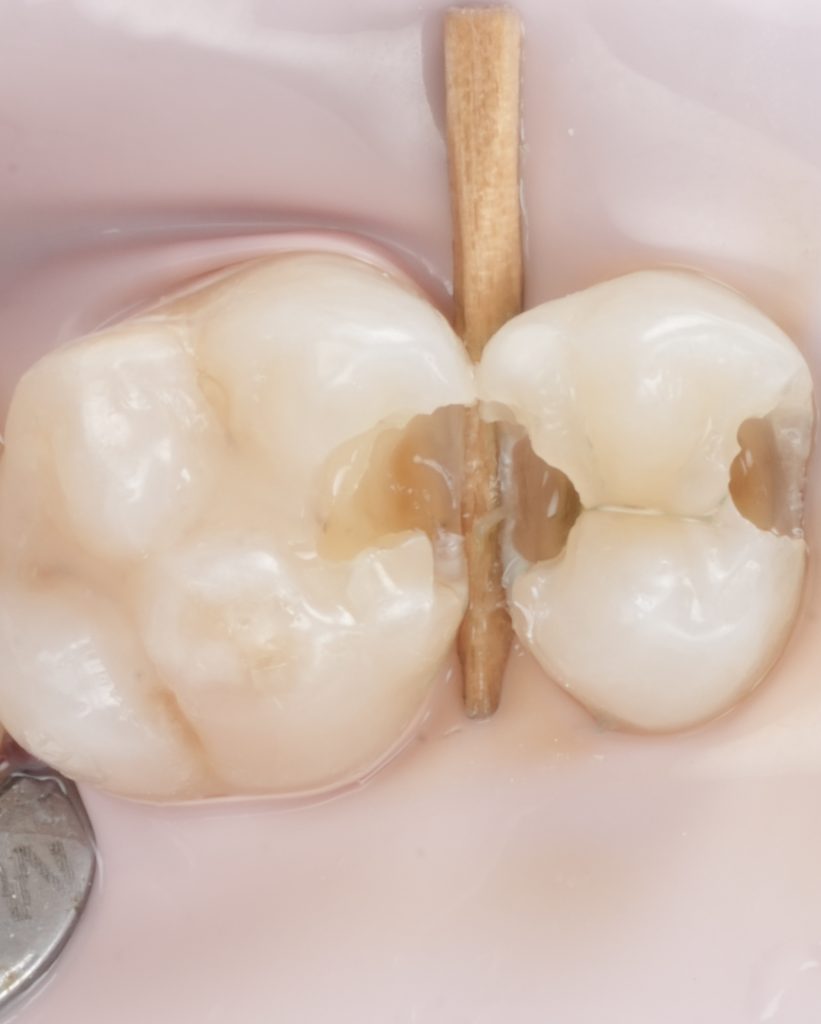
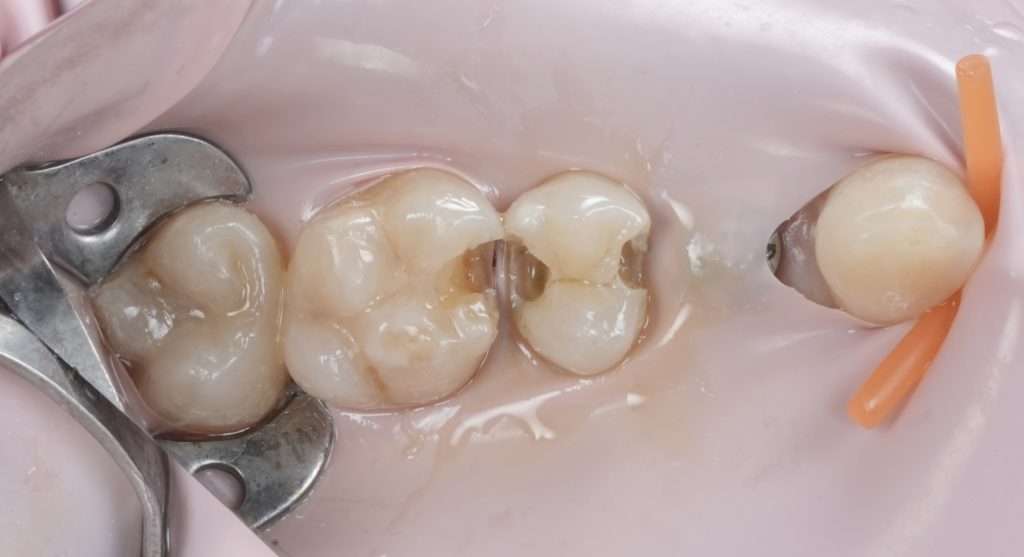
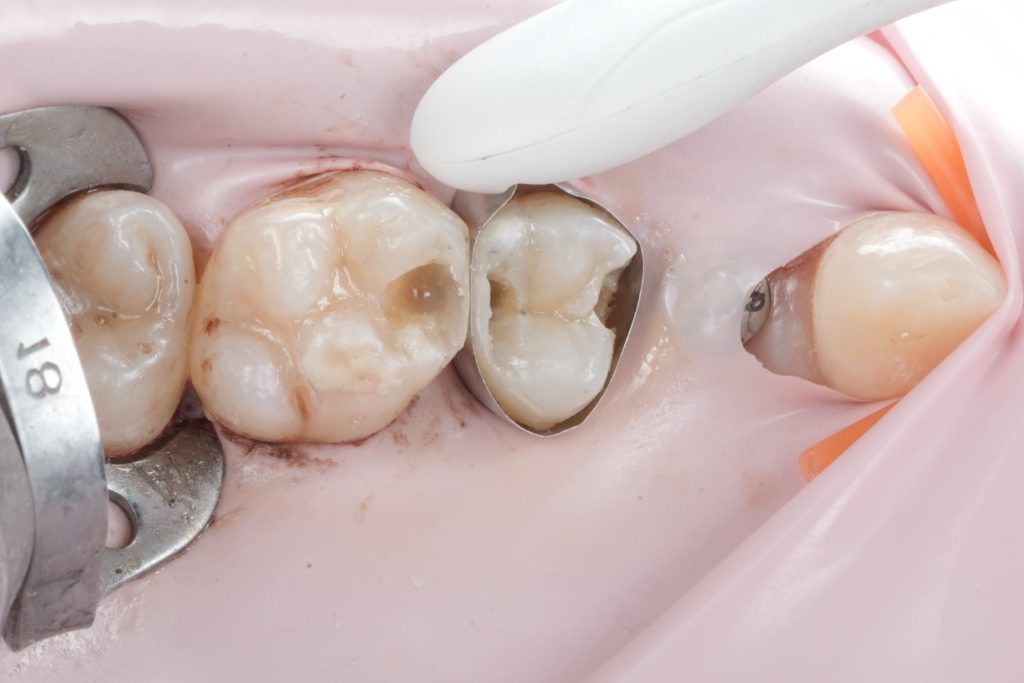
4) Conservative cavity preparation and caries removal
Step 4: Access and outline
- Access the lesion while preserving marginal ridges and enamel where possible.
- Keep internal line angles rounded to reduce stress concentration.
Step 5: Caries removal strategy
- Remove unsupported enamel.
- Remove infected dentin; preserve affected dentin where appropriate to avoid over-prepping.
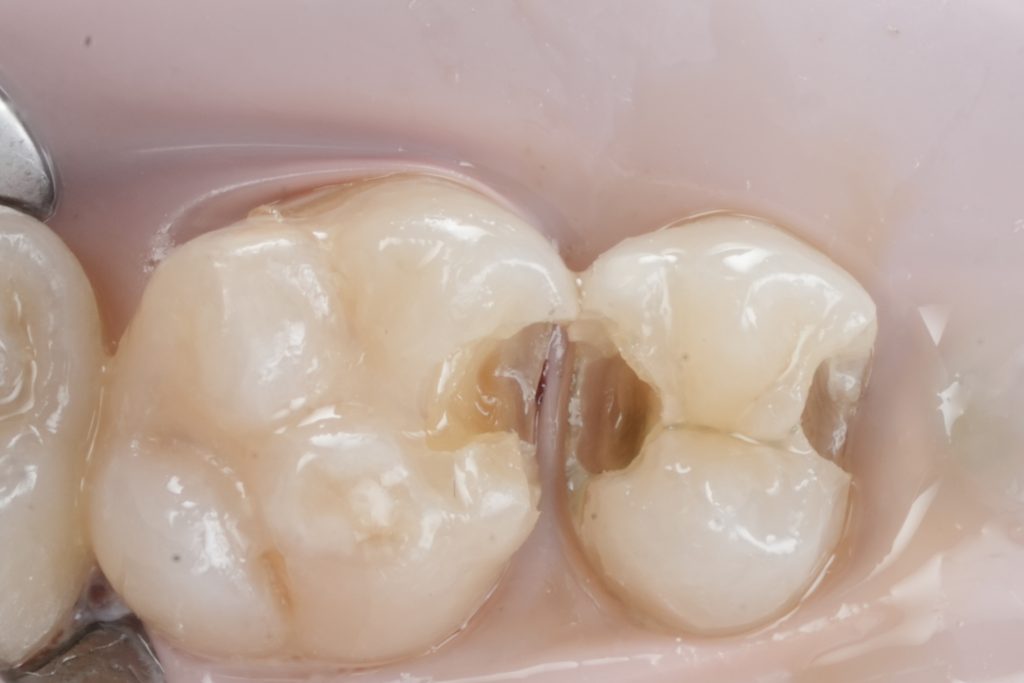
Step 6: Finish proximal box
- Create a clean, inspectable gingival floor.
- Smoothen enamel margins (a clean bevel only where indicated; posterior proximal boxes often rely on crisp margins rather than aggressive beveling).
Images to place
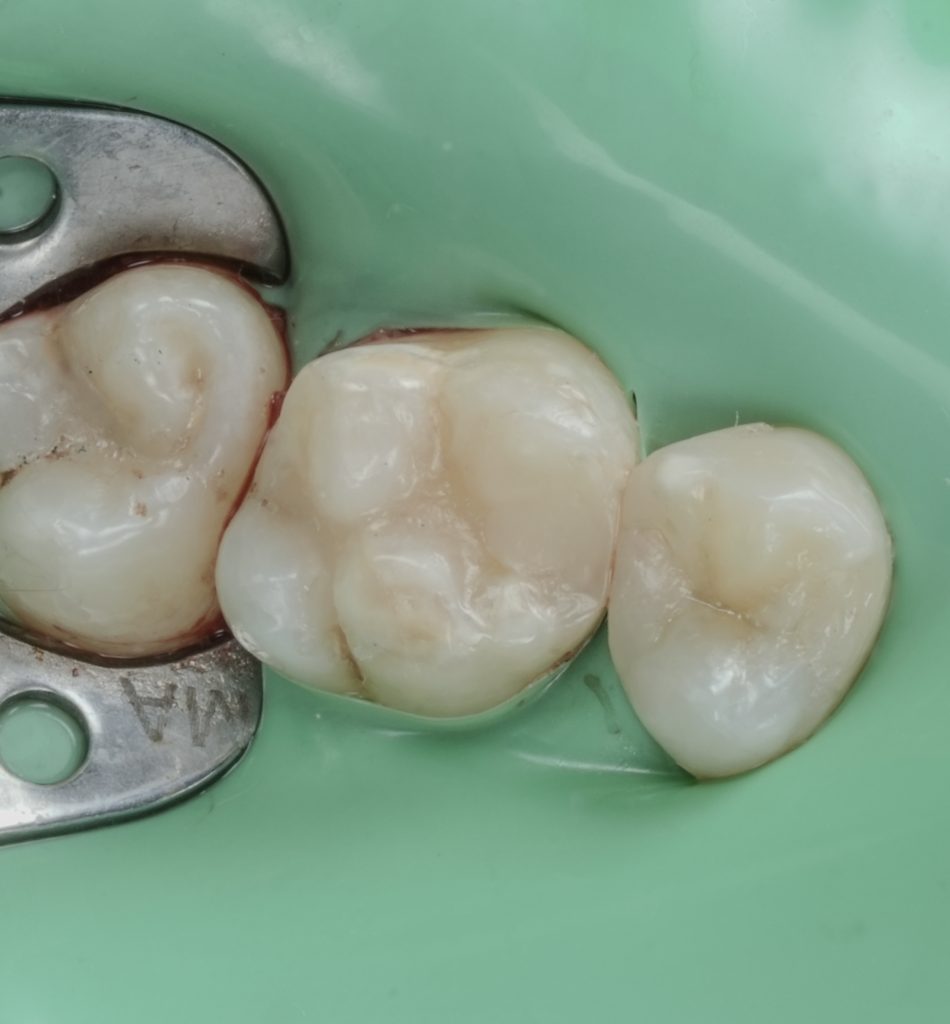
- Fig. 5: Prepared cavity occlusal view.
- Fig. 6: Proximal box close-up (after caries removal).
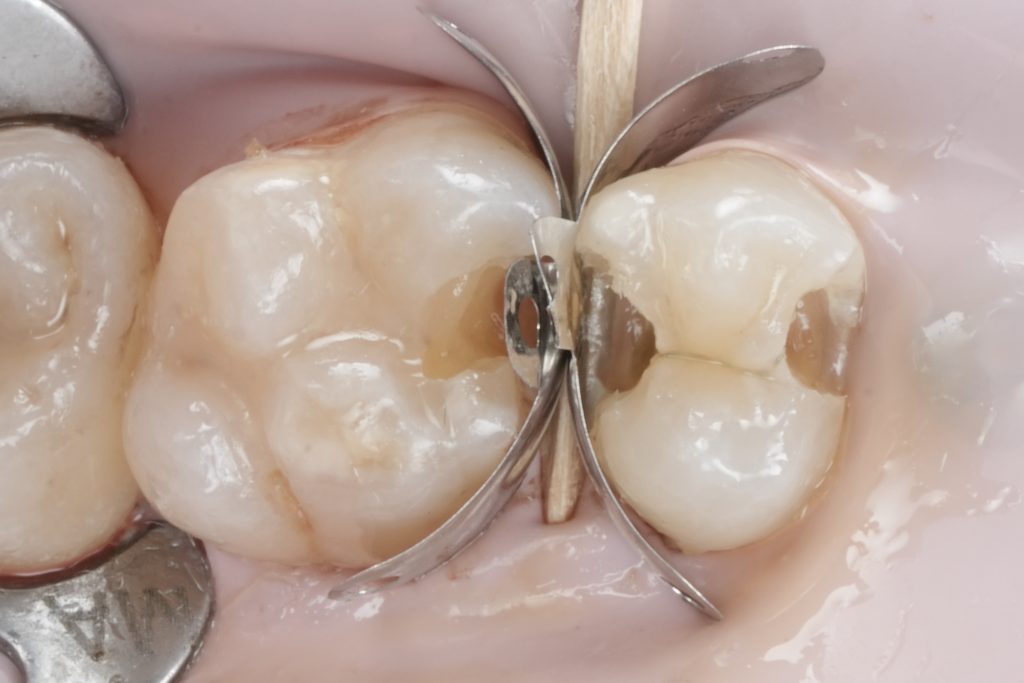
5) Matrixing for contact and emergence profile
Step 7: Sectional matrix placement
- Seat a sectional matrix band tightly around the proximal box.
- Confirm band adaptation at the gingival margin (no visible gap).
Step 8: Wedge + ring
- Re-seat wedge firmly to seal the gingival margin.
- Place separation ring to create temporary separation for a tight final contact.
Checkpoint (non-negotiable)
- No band “floating” at the gingival margin
- Wedge seals the margin
- Ring fully seated and stable
Images to place
- Fig. 7: Sectional matrix + wedge placed.
- Fig. 8: Ring in place (occlusal view showing band adaptation).
6) Adhesive protocol
(Write this in your exact material names; below is a clean, evidence-aligned template.)
Step 9: Surface conditioning
Option A (common and predictable):
- Selective enamel etch with 35–37% phosphoric acid (10–15 s enamel only)
- Rinse, gently air-dry (do not desiccate dentin)
Step 10: Adhesive application
- Apply universal/3-step adhesive per manufacturer instructions (active scrubbing).
- Air-thin thoroughly to evaporate solvent.
- Light cure with verified output.
Why this matters
Universal adhesives can perform well, but technique sensitivity (solvent evaporation, active application, and correct etch strategy) heavily influences bond performance.
Images to place
- Fig. 9: Matrix in place + adhesive stage (before composite).
7) Composite build-up (predictable anatomy)
Step 11: Build the proximal wall first (wall-first technique)
- Place a thin increment to form the proximal wall against the matrix (cervical seal first).
- Light cure.
- This converts the Class II into a Class I, making the rest of the build easier and more controllable.
Step 12: Dentin replacement increments
- Place composite in small increments to reduce shrinkage stress and ensure full cure.
- Keep each increment thin enough for your curing light and composite opacity.
Step 13: Enamel layer and occlusal anatomy
- Final enamel layer: sculpt primary anatomy (cuspal inclines, central groove, marginal ridge height).
- Add secondary anatomy lightly (avoid deep, plaque-trapping grooves).
Step 14: Final cure strategy
- Cure from occlusal.
- If possible, additional cure from buccal/lingual after removing the ring (before band removal if access allows).
Why this matters
Composite restorations are highly technique-dependent; stress-controlled layering and correct curing are part of what separates “looks good today” from “still good in years.”
Images to place
- Fig. 10: Proximal wall formed (band still in place).
- Fig. 11: Occlusal build-up before finishing.
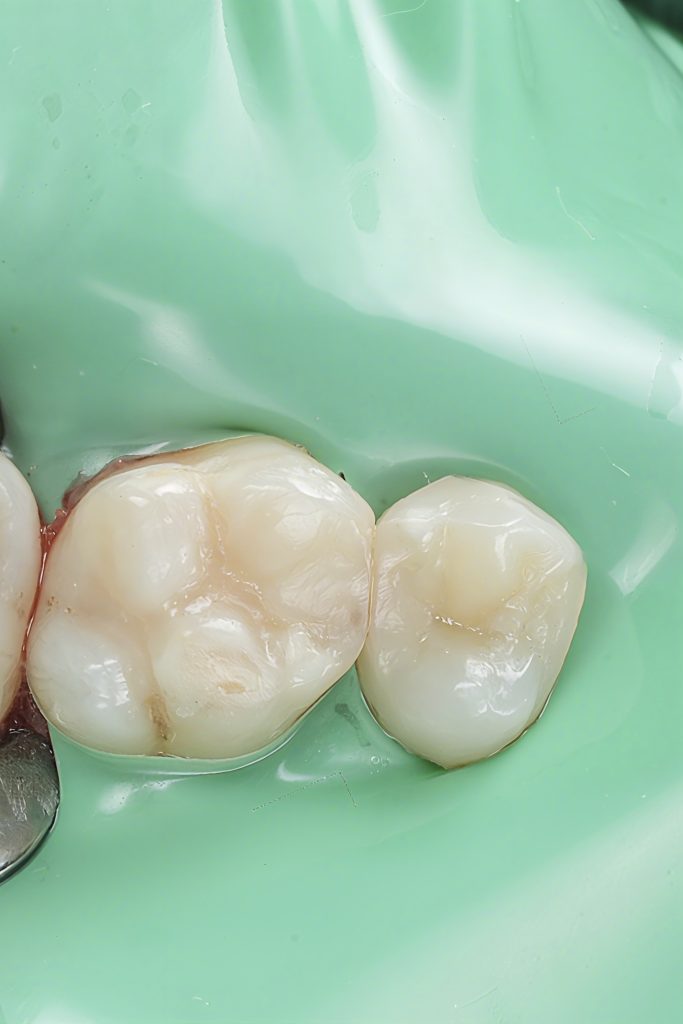
8) De-matrixing, finishing, and polishing
Step 15: Remove ring → wedge → matrix (in that order)
- Inspect the contact with floss (should “snap” through, not shred).
- Check emergence profile visually and with an explorer.
Step 16: Gross finishing
- Refine marginal ridge height and occlusal anatomy.
- Adjust any overhangs carefully (finishing strip if needed interproximally).
Step 17: Occlusion
- Check in MIP and excursions.
- Remove high points conservatively, then re-polish.
Step 18: Polishing sequence
- Pre-polish (rubber points/discs depending on anatomy)
- High-gloss polish (final cups/brushes)
- هدف: smooth, cleansable surface with natural light reflection.
Images to place
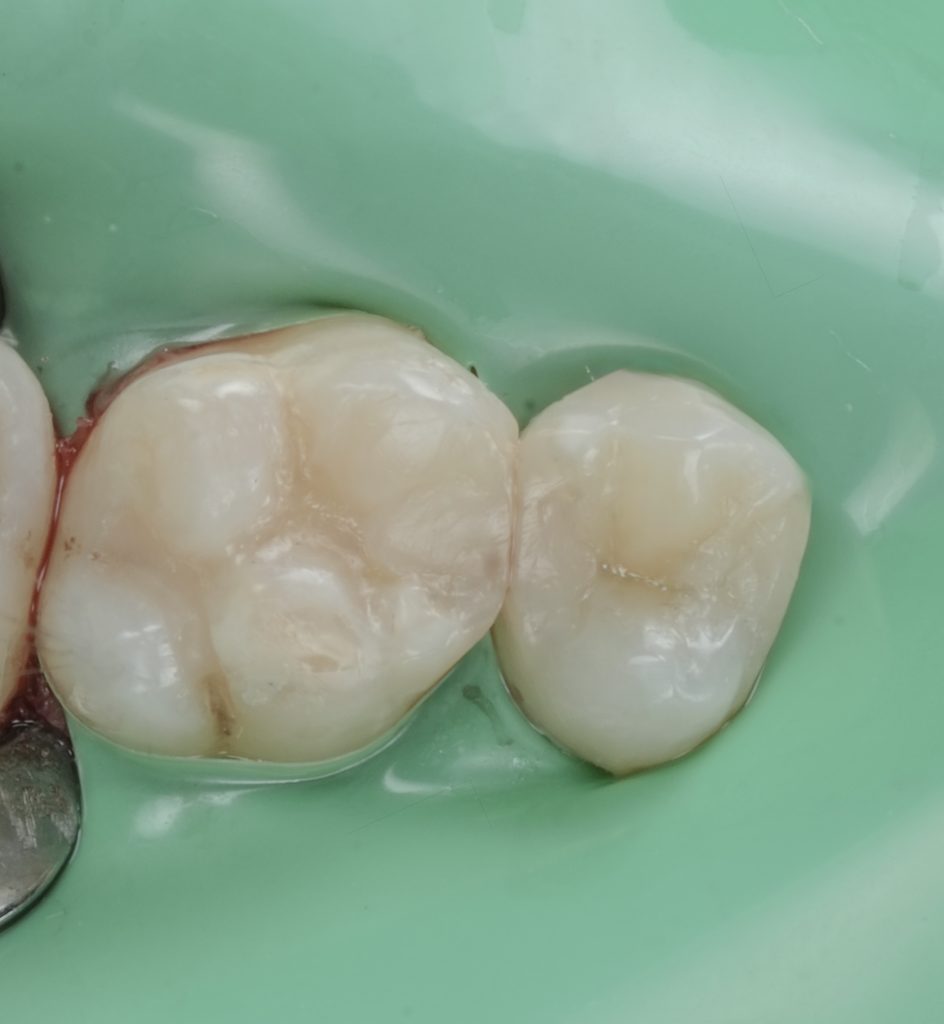
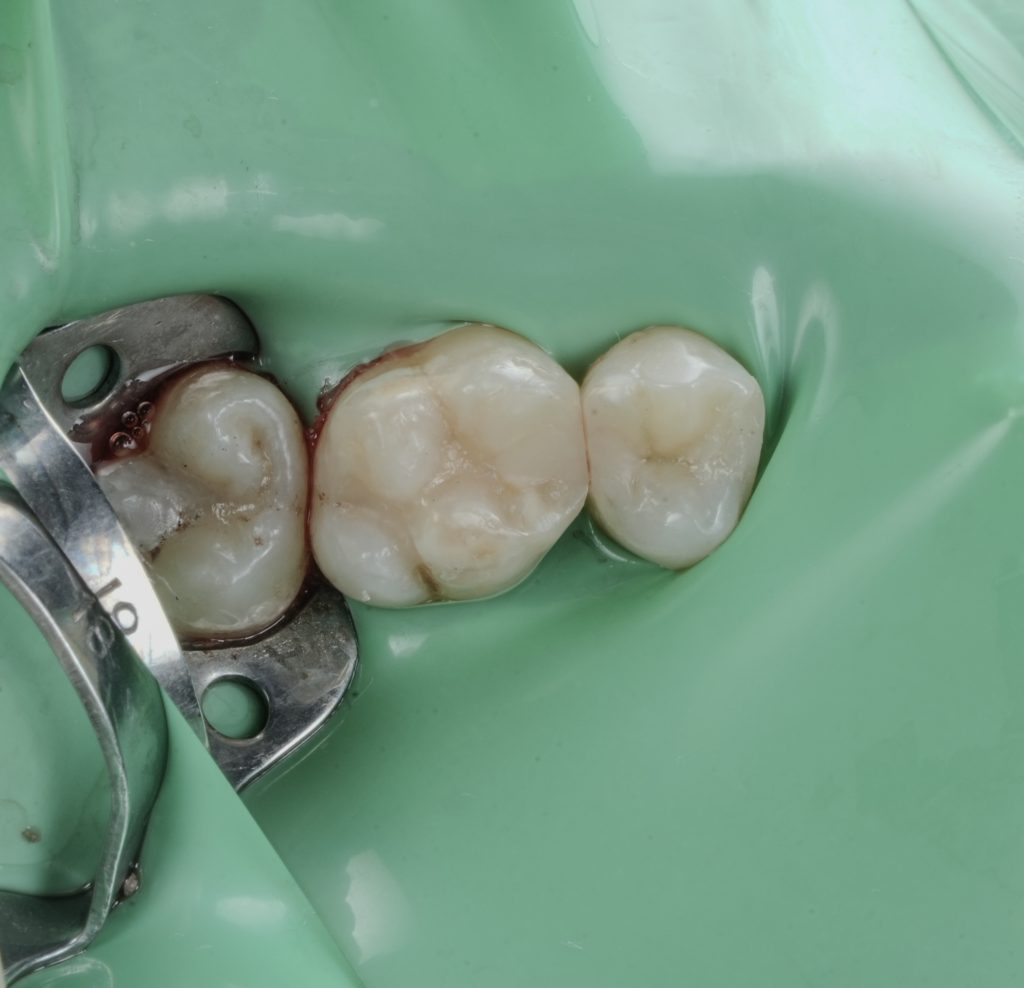
- Fig. 12: Immediate post-op occlusal (dam still on).
- Fig. 13: Post-op occlusal after polish (dam off).
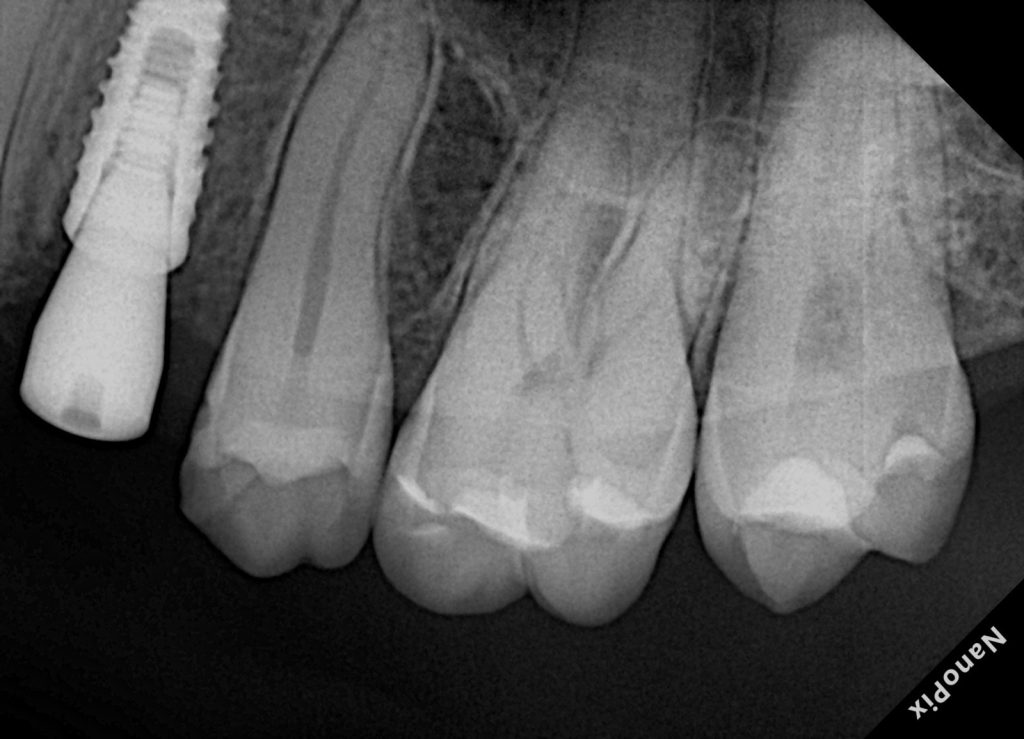
9) Radiographic verification
Step 19: Post-op bitewing/periapical
Assess:
- No overhangs
- Proper marginal seal
- Anatomical contour
- Contact area (indirect sign: no obvious open contact + correct contour)
Images to place
- Fig. 14: Post-op radiograph.
Discussion
This case highlights three predictors of success: (1) strict isolation, (2) contact-driven matrixing, and (3) controlled composite placement with proper curing and finishing. Long-term reviews show posterior composites can be durable, but failure risk rises with proximal deficiencies, marginal leakage, and secondary caries, which are often technique-related rather than “material-related.”
Recent clinical evidence also supports that matrix system choice and separation protocols can affect proximal contact tightness in Class II resin composite restorations.
Universal adhesive systems have simplified bonding, but they remain technique-sensitive, especially regarding solvent evaporation, air-thinning, and the etch strategy.
Conclusion
A predictable posterior composite is not just “placing composite.” It is a sequence: isolate, seal, separate, rebuild the contact first, layer with control, cure with verified output, and finish to a cleansable anatomy. Following this protocol consistently produces restorations that look natural clinically and read clean on radiographs.
References (Vancouver style)
- Ástvaldsdóttir Á, Dagerhamn J, van Dijken JWV, Naimi-Akbar A, Sandborgh-Englund G, Tranæus S, et al. Longevity of posterior resin composite restorations in adults: A systematic review. J Dent. 2015.
- Opdam NJM, van de Sande FH, Bronkhorst E, Cenci MS, Bottenberg P, Pallesen U, et al. Longevity of posterior composite restorations: A systematic review and meta-analysis. J Dent Res. 2014.
- Ferracane JL (supporting overview via PMC review). Resin composite materials and wear/clinical considerations (article citing Ferracane’s state-of-the-art work).
- Costa DM, et al. Bond capability of universal adhesive systems to dentin (and discussion on technique sensitivity and longevity). Review article (PMC). 2017.
- Randomized clinical trial evidence on matrix systems and proximal contact tightness in Class II resin composites. PubMed indexed clinical trial.
{"source_type":"hypic","tiktok_developers_3p_anchor_params":"{"client_key":"awgvo7gzpeas2ho6","capability_key":["edit"],"capability_extra_v2":{"edit":[{"panel":"hd_quality_picture"}]},"template_id":"","filter_id":[]}","data":{"enter_from":"enter_launch","filterId":"","stickerId":"","playId":"","infoStickerId":"","appversion":"7.7.1","imageEffectId":"","product":"retouch","os":"ios","pictureId":"32C4F43D-9F6F-4E5F-AAB9-F62771DD5CC3","activityName":""}}
Share on: