The case shows the step by step process in placing a single implant for missing tooth number #24 .
Patient had undergone extraction of her tooth nearly 5 months back due to a failed root canal treatment.
She was keen to have the tooth replaced for esthetic reasons.
The following case presentation emphasizes some of the key steps in the surgical process.. explanations are seen below the photographs..
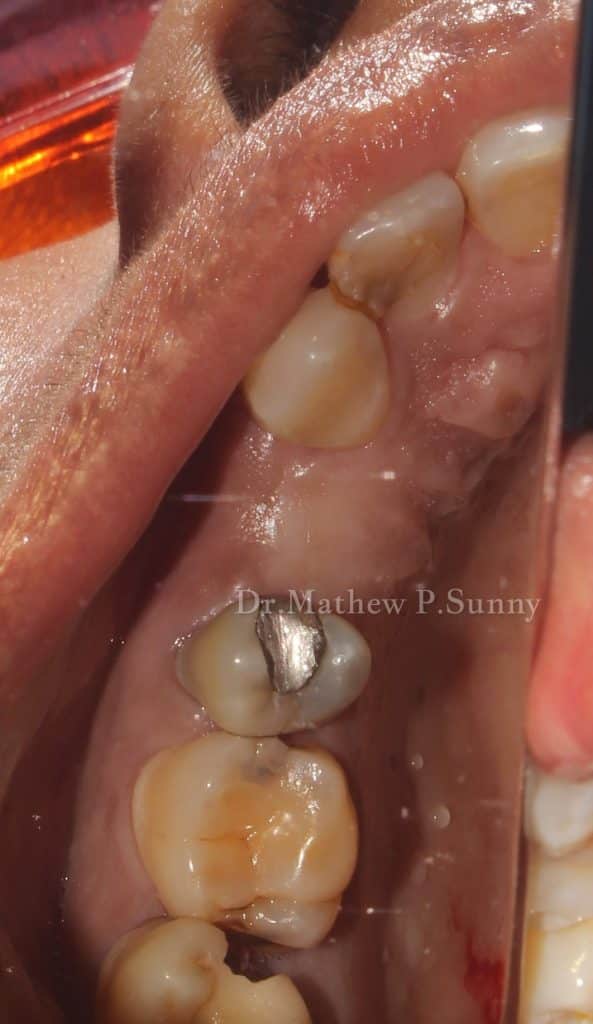
Initial presentation showing a well healed ridge with adequate width.. IOPA had confirmed the presence of adequate height as well..
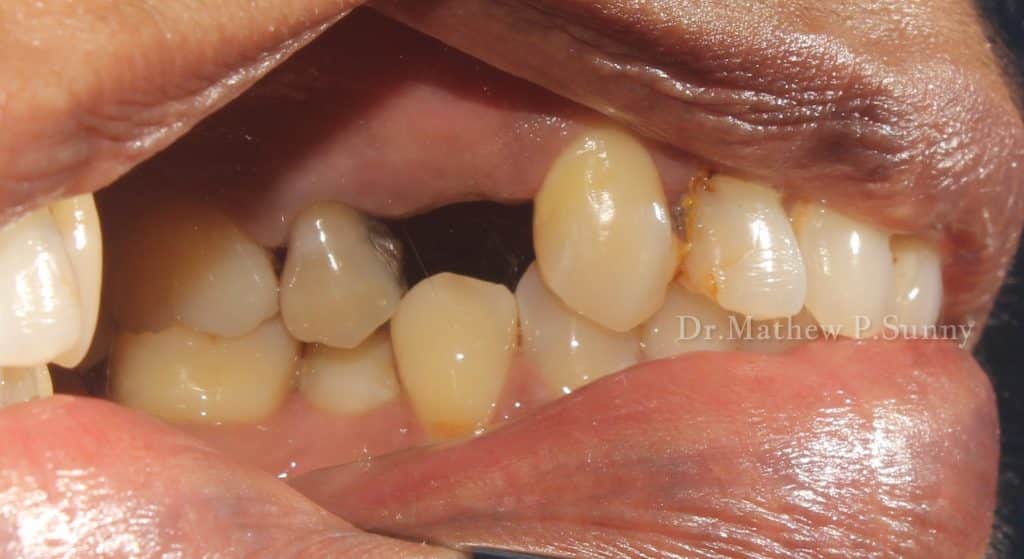
Lateral view is important.. it shows mild supra eruption of the lower premolar into the restorative space.. thus a screw retained restoration will be needed..
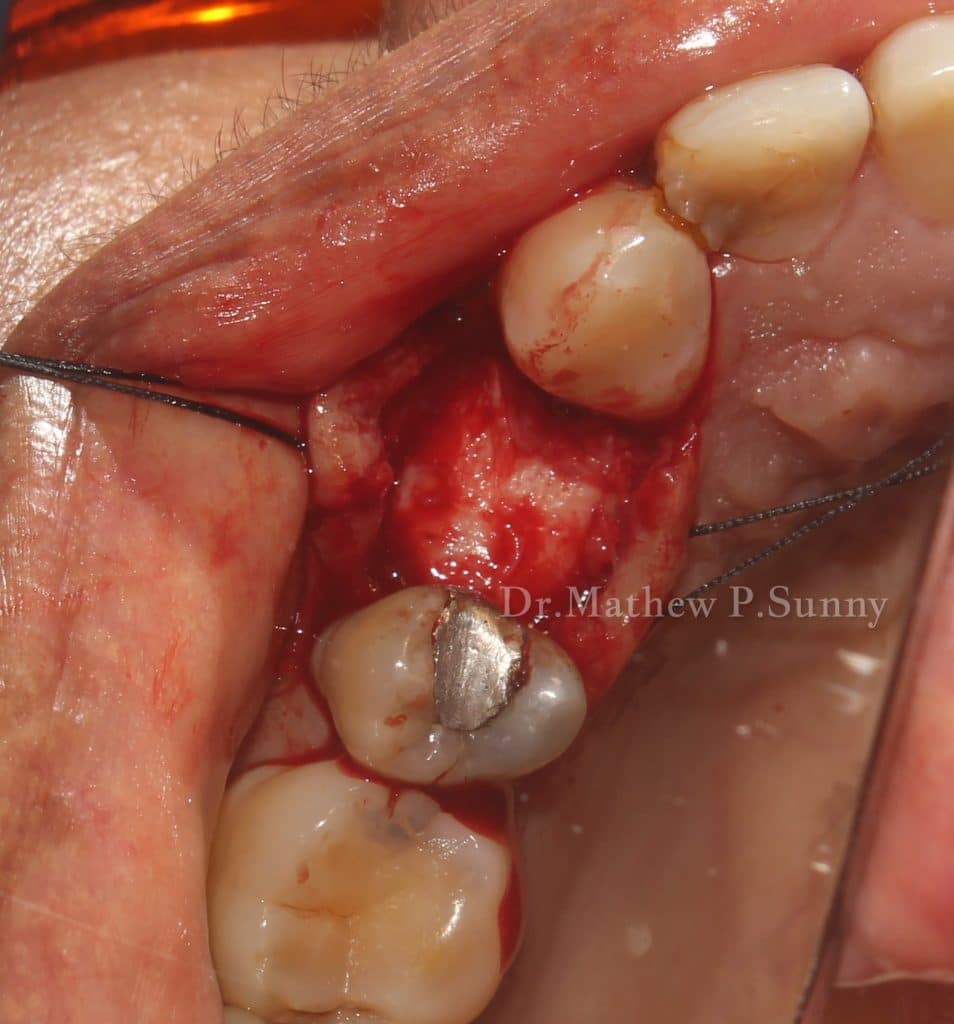
Clean flap elevation bucally and palatally... note the use of 3-0 silk sutures to keep the flaps retracted.. providing good vision of the surgical site..
Initial ostoetomy is done using a round bur to determine the mesio distal and bucco lingual centering of the drilling site..
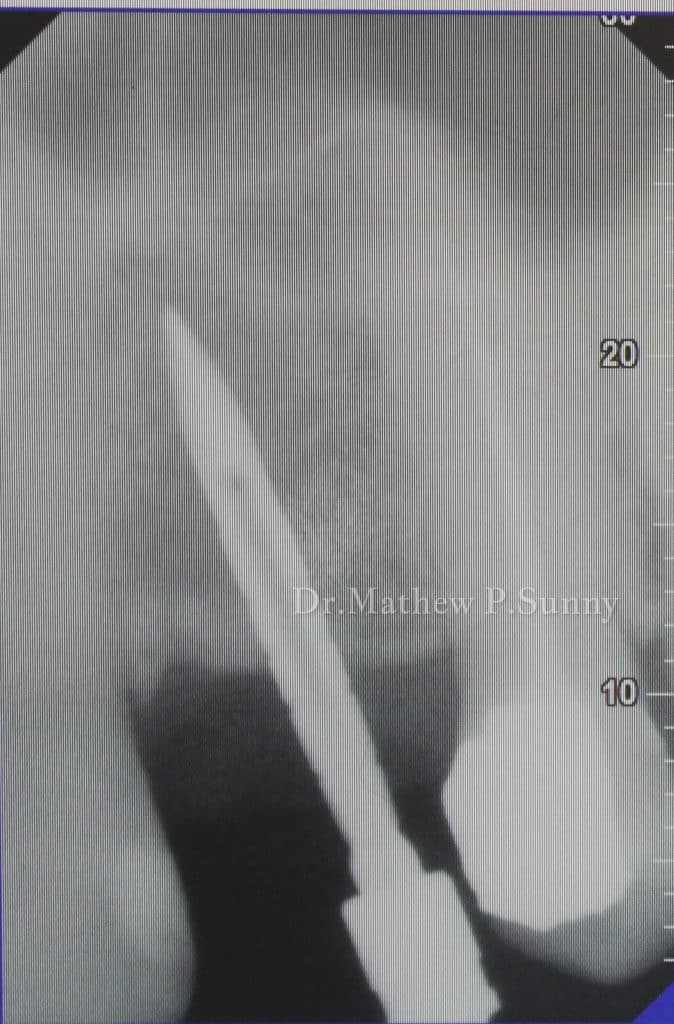
After initial drilling with the Lindemann drill.. and iopa check shoes that the angulation is wrong..

With the consequent drills.. the angulation is then corrected..
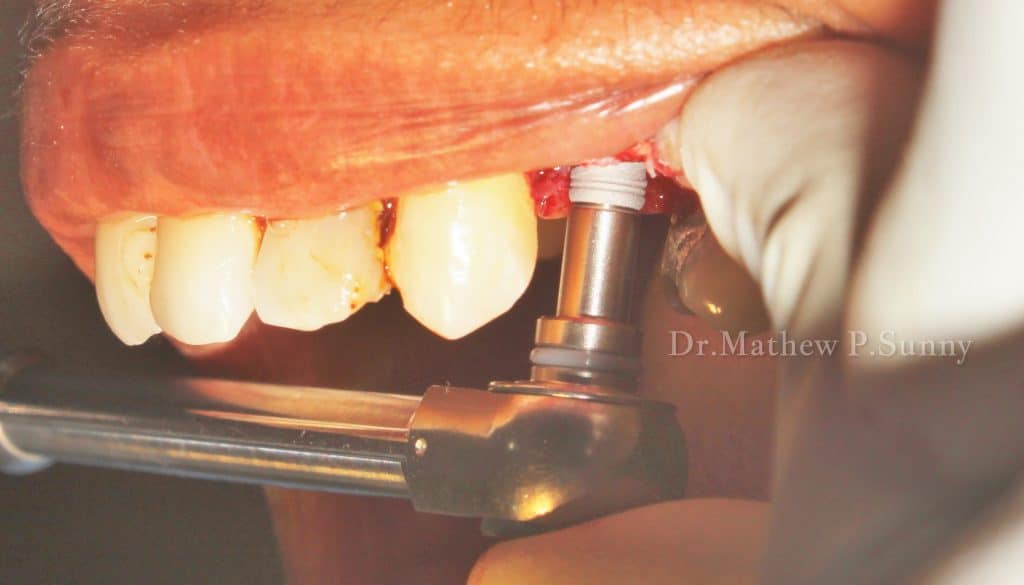
4.2 x 10 mm implant is placed after a final drill size of 3.6 mm was used..
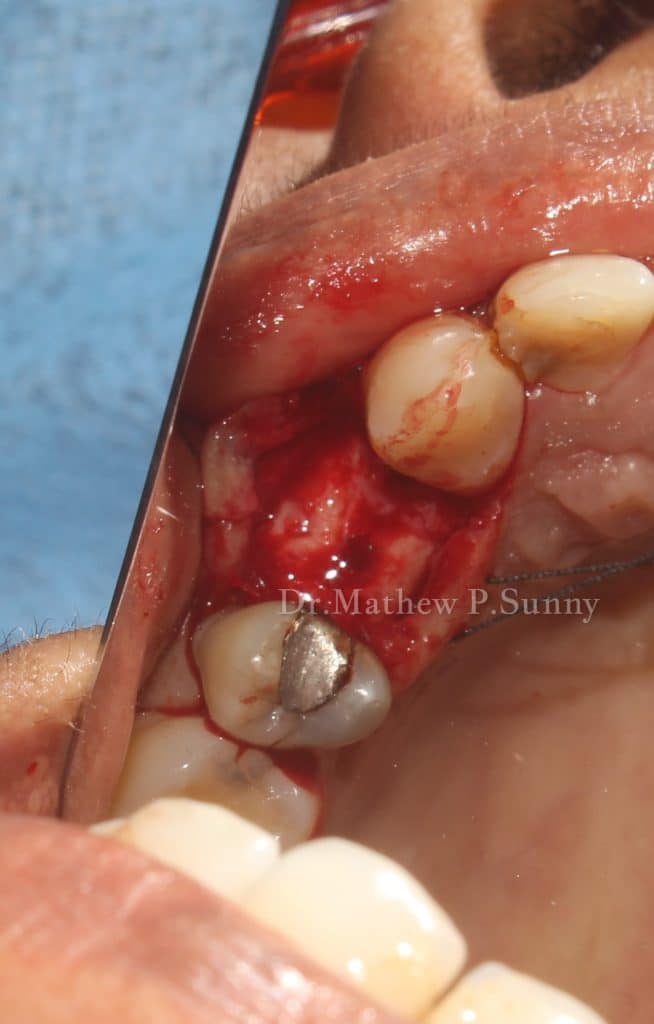
The implant is placed 0.5 mm subcrestal.. note the good bucco lingual and mesio distal positioning of the implant..
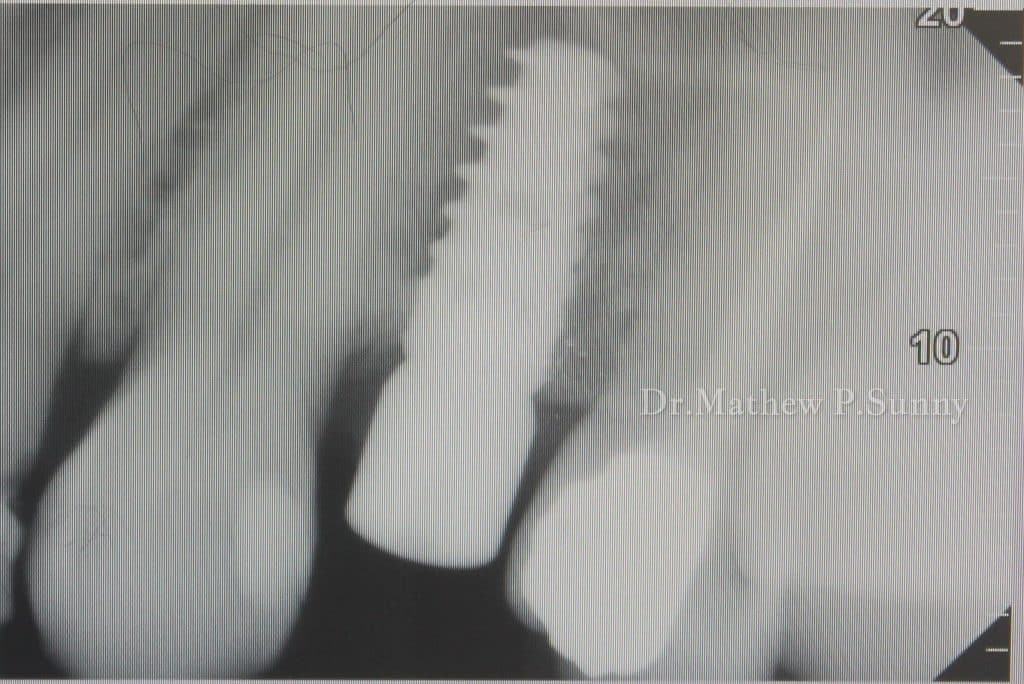
IOPA confirms the same..
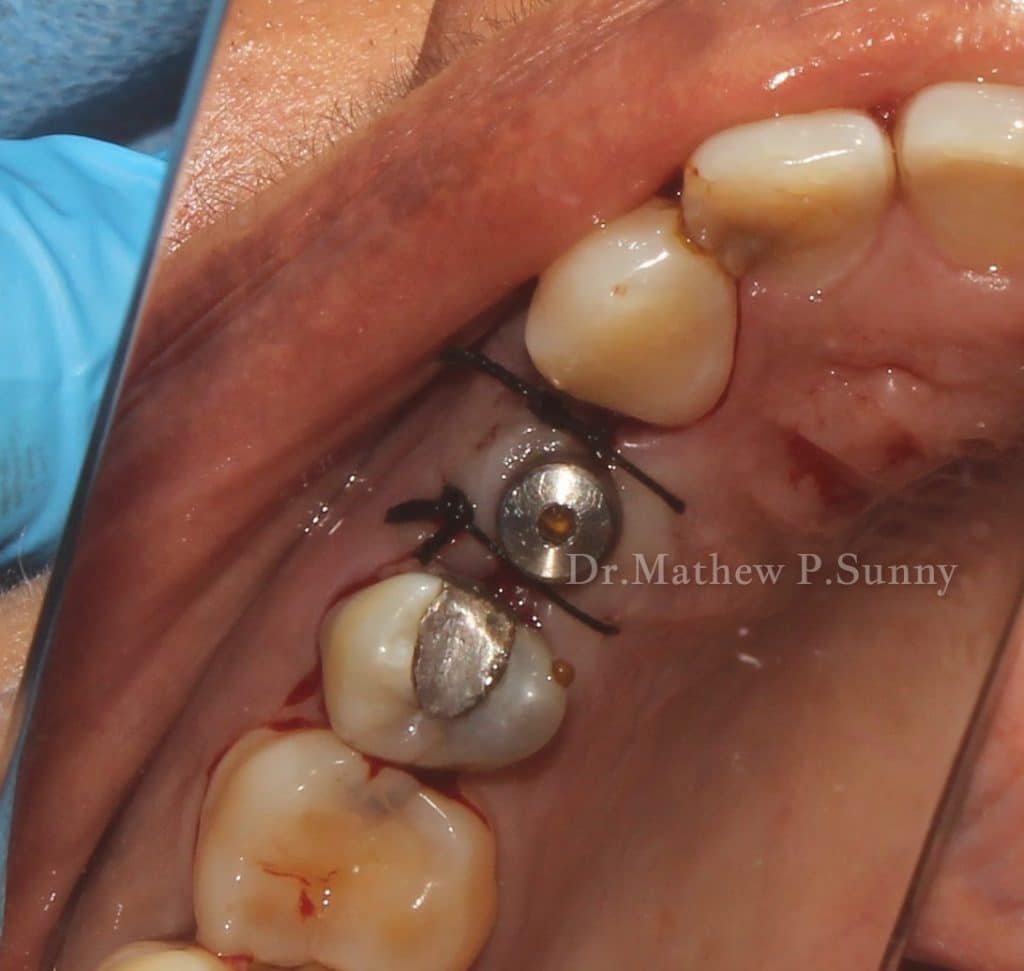
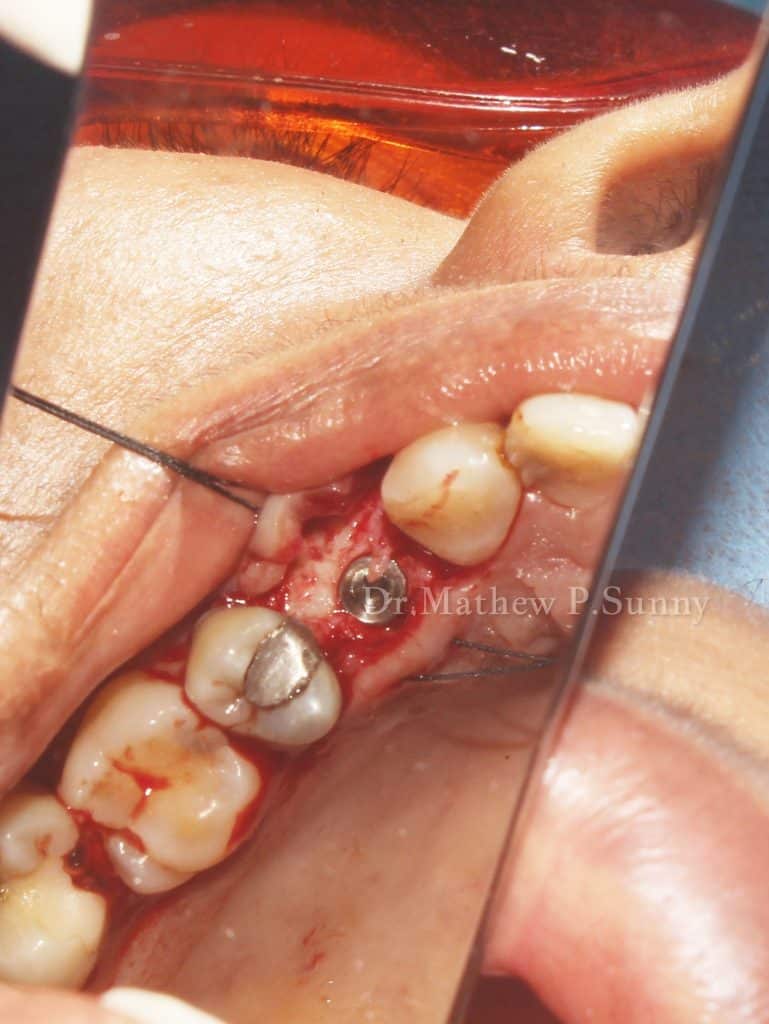
Final clinical photograph showing the use of two simple interrupted sutures to close the flaps..
Prosthetic phase is started after 3 months of healing..
Share on: