This surgery is described from A to Z. Find below all the steps you can find in the video of this minimally invasive Maxillary sinus lift with crestal lateral approach, and some pics from the surgery.
- Crest incision slightly palatal
- Tissue detachment – Tool: ochsenbein scalpel
- Flap detachment – Tool: periosteal elevator
- Mesial release cut
- Vestibular retracting suture anchored to the inner lip surface
- Lateral wall window – Tool: sonic 2 mm ball bur (by Komet)
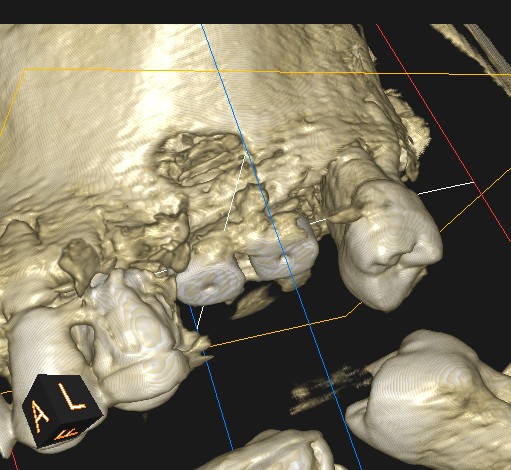
- CBCT helps us for the exact position of the window
- Be careful do not perforate the Schneider’s membrane with bur
- 2mm micro periosteal elevator (by Meta) to remove the residual bone and reveal the cleavage plane
- Sonic peeler to start the Schneider’s membrane lifting
- It is possible to refine the margins of the bone window with a very small sonic ball bur
- Manual endosteal elevators have various shapes and angles
- The elevators should be used adherent to the interior wall of the maxillary sinus
- CBCT should guide the detachment of the sinus membrane
- Attention should be paid to any bone septa highlighted by the CT scan
- The thin sinus membrane must be always protected during blood suction
- Alternate sonic and manual elevators to detach the membrane from the sinus wall, avoiding breaking the membrane
- A breach of the membrane of more than 2 mm causes the interruption of the procedure
- Sonic elevators allow an easy detachment of the maxillary sinus membrane thanks to their vibration associated to the ultrasound water jet
- It is possible to refine the margins of the bone window with a very small sonic ball bur
- During patient breathing you should see the membrane move following the breathing rhythm
- After the membrane has been detached, a bovine bone substitute (Bio-oss, Geistlich) is inserted.
- Bone filling should be very delicate and gradual
- Before a new application of Bio-Oss it is convenient to create the space with a periosteal elevator
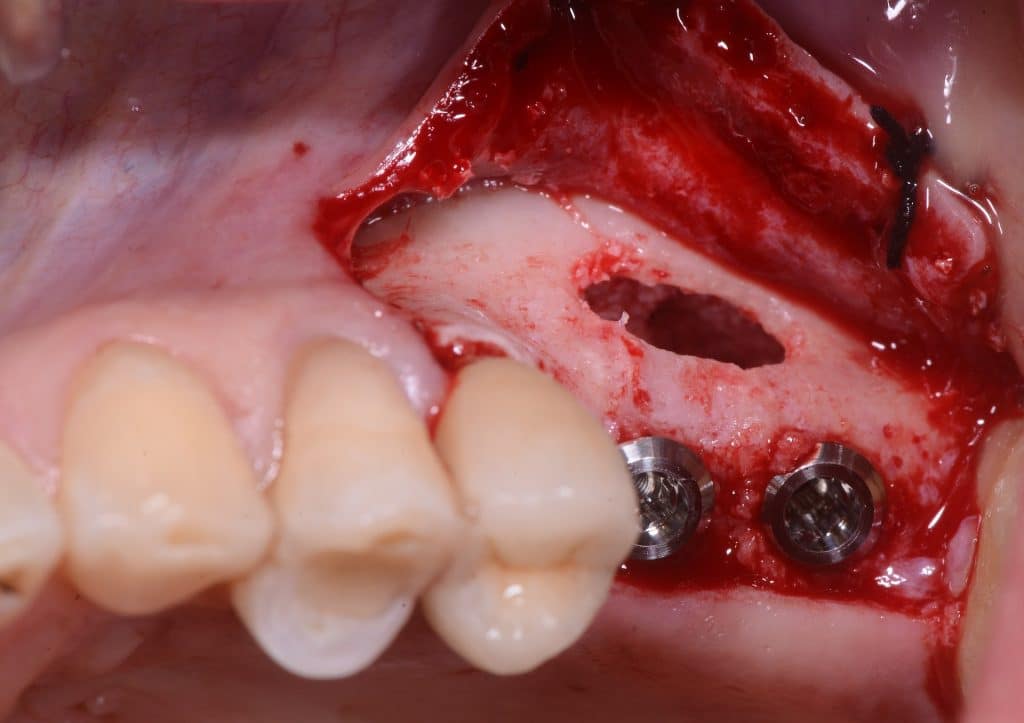
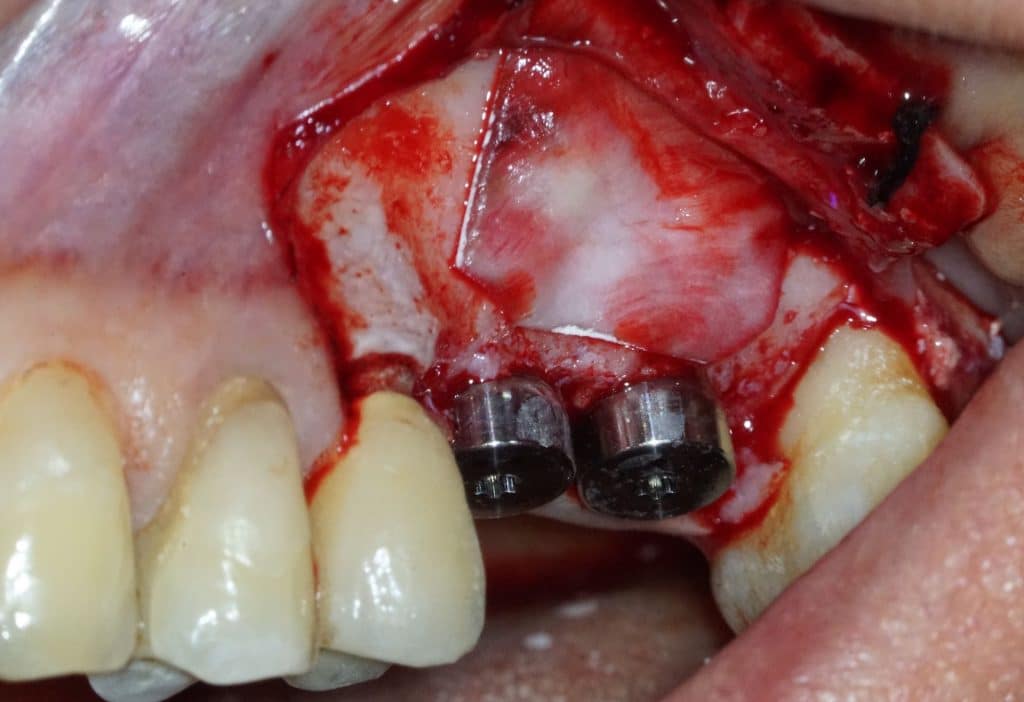
- Two implants are placed drilling the 3 mm of residual crestal bone
- To drill the holes it is recommended to use vibrating burs mounted on a sonic handpiece
- You can see the apexes of the depth indicators inside the maxillary sinus
- To drill the holes it is recommended to use vibrating burs mounted on a sonic handpiece
- Two 8 mm Straumann TLX implants placed
- TLX implants have an excellent primary stability in most cases (as post-extraction cases). But in the case of sinus lift they tend to lose primary stability in the last stages of screwing. Therefore in this case a conical implant is preferable.
- Implants can be seen inside the maxillary sinus through the bone window
- A little more of Bio-oss is inserted
- When cleaning with saline solution the sinus window must always be protected
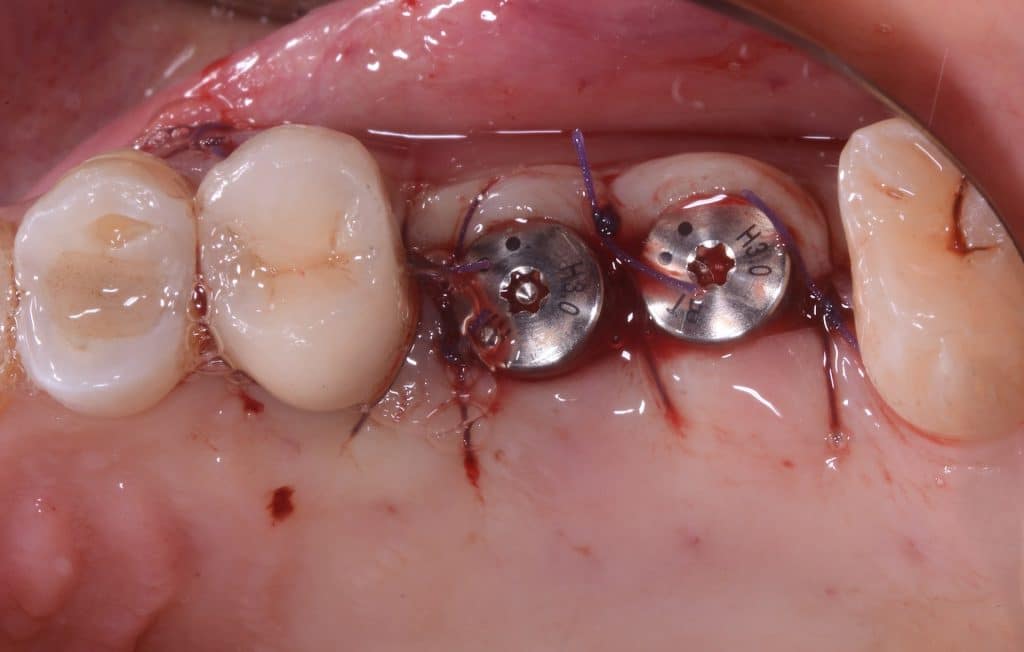
- A Bio-Gide collagen membrane is applied over the window
- Suturing should start from the mesial release cut
- The stitches on the release cut should be oblique to compensate for the flap traction
- The flap is sutured distally
- Dexametasone phosphate sodium is injected into the tissues to have an anti-inflammatory action localized in the surgical area
Bibliography
- Int J Oral Maxillofac Surg. 2016 Dec;45(12):1570-1576.
doi: 10.1016/j.ijom.2016.09.023. Epub 2016 Oct 17.
Maxillary sinus lift surgery-with or without graft material? A systematic review
- Stomatologija. 2018;20(1):14-21.
Uses of maxillary sinus lateral wall bony window in an open window sinus lift procedure: literature review
- Cochrane Database Syst Rev. 2008 Jul 16;(3):CD003607.
doi: 10.1002/14651858.CD003607.pub3.
Interventions for replacing missing teeth: bone augmentation techniques for dental implant treatment
Panoramix Xray
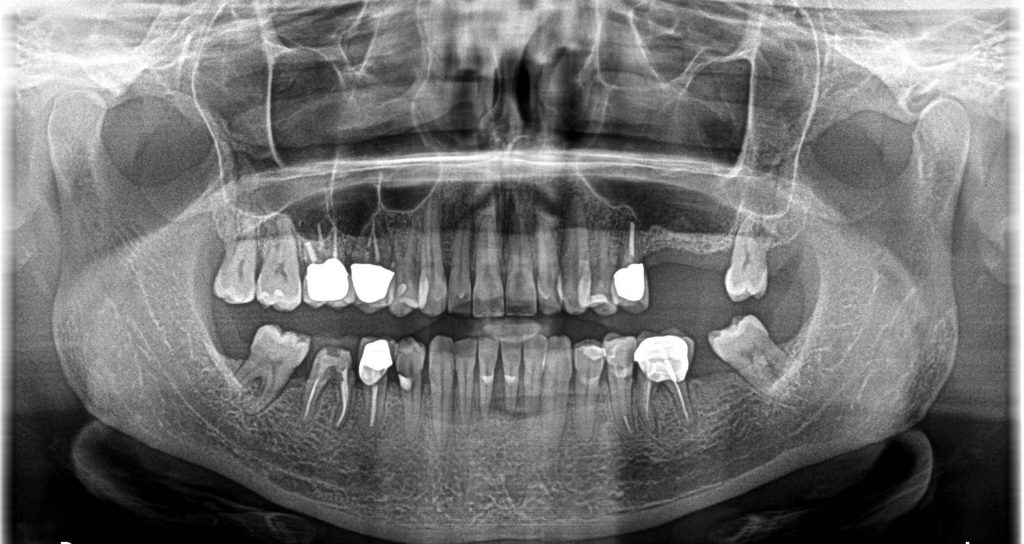
panoramic view pre-op
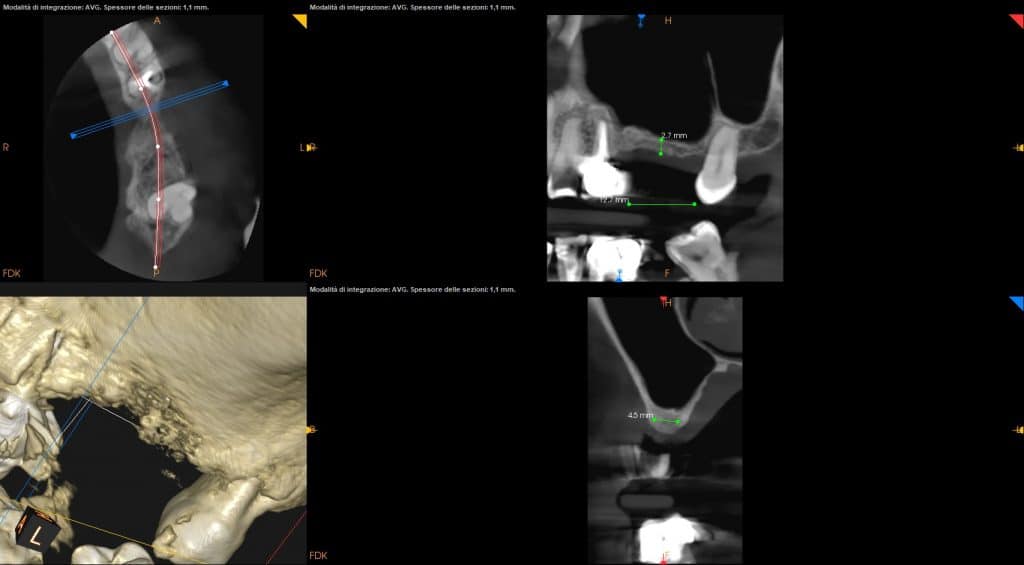
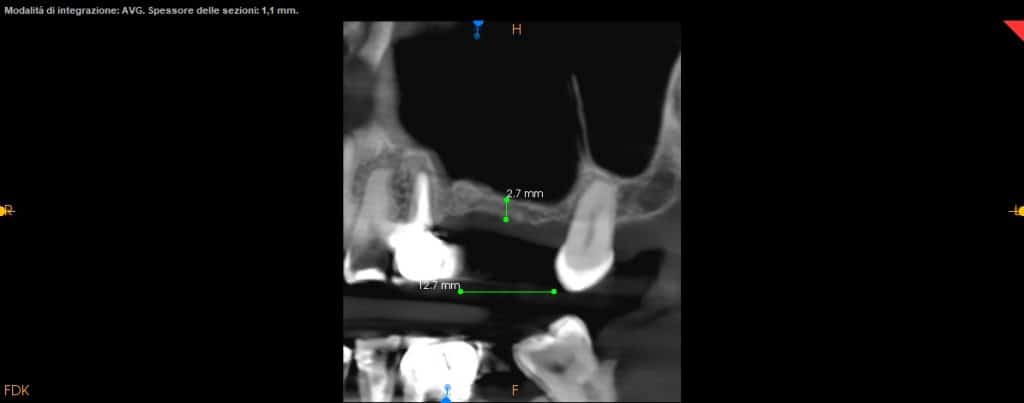
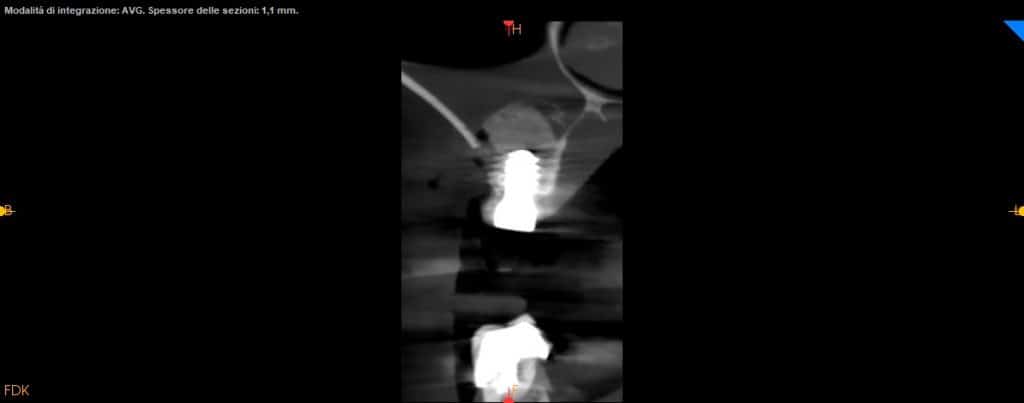
CBCT

operating area, occlusal view
operating area, lateral view
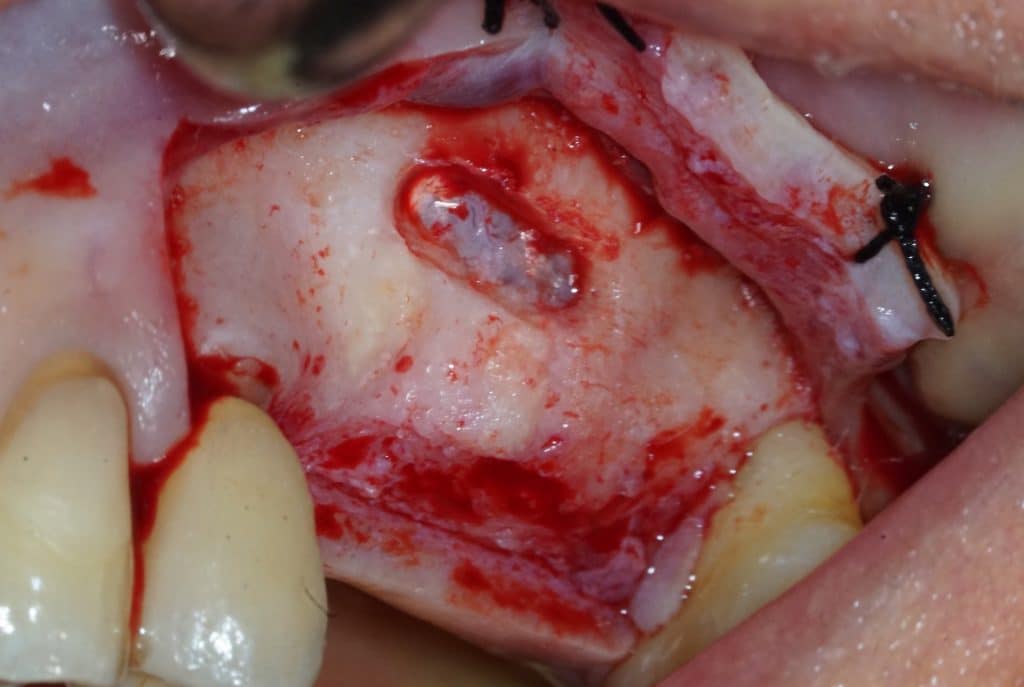
Schneider's membrane
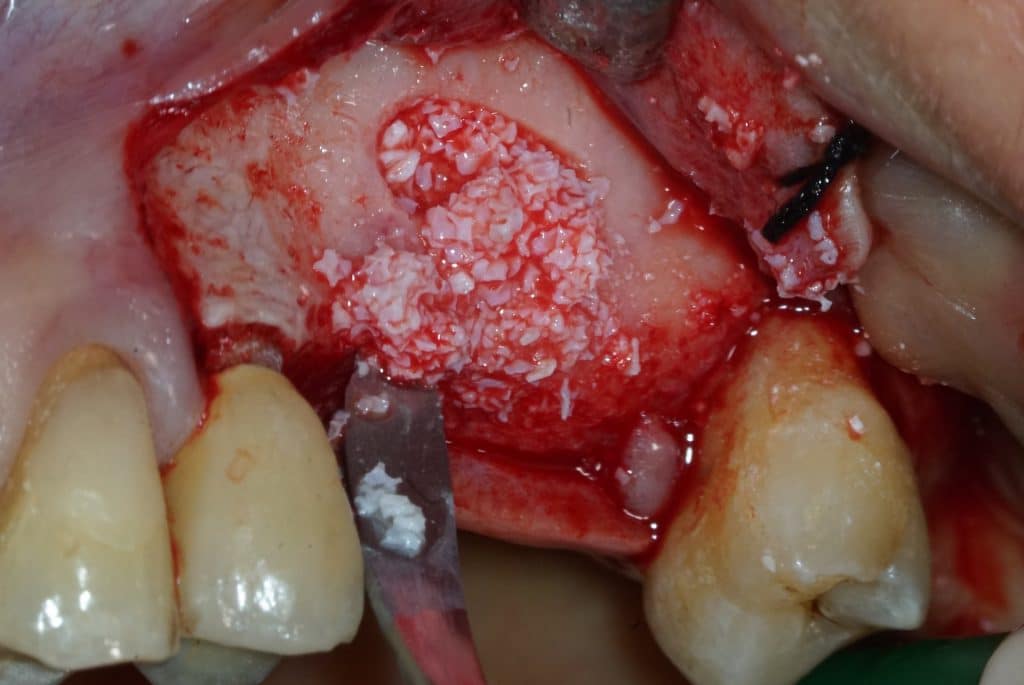
Bio-Oss insertion

Depth indicators

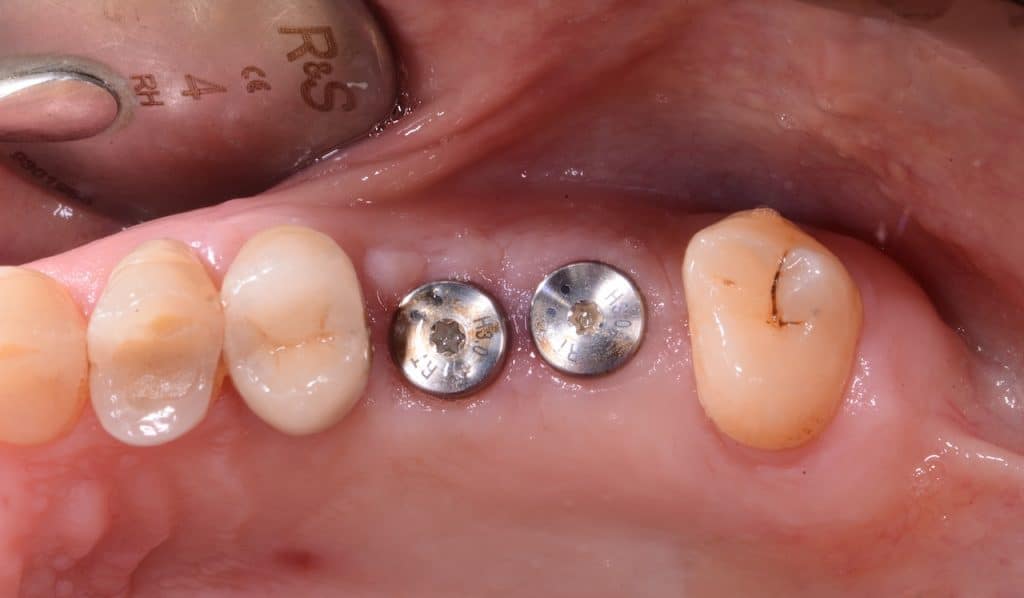
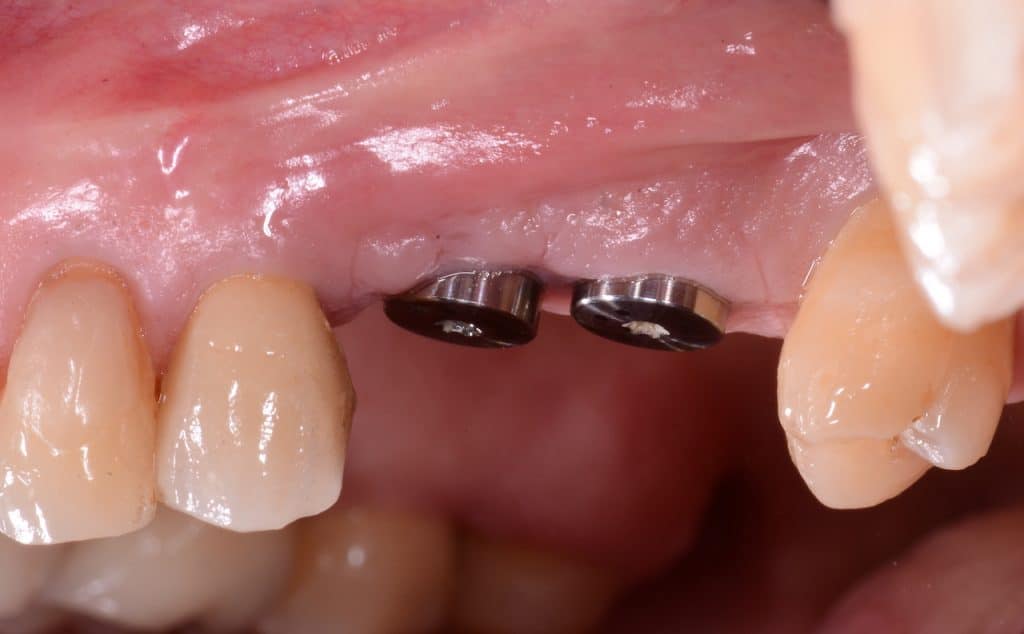
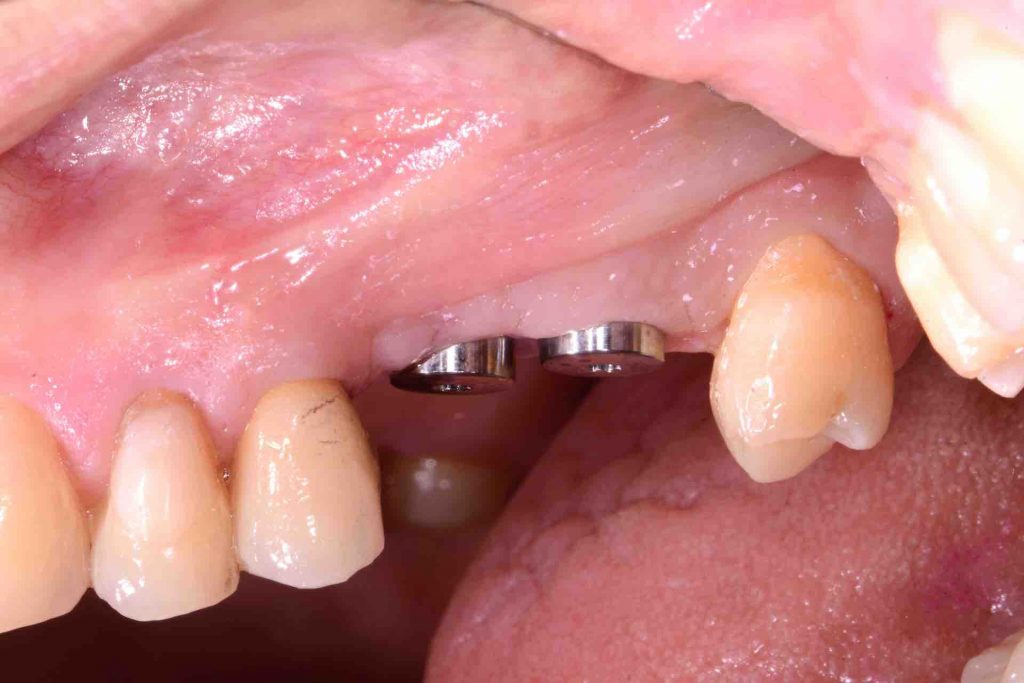
lateral sinus wall, implants view
lateral sinus window view
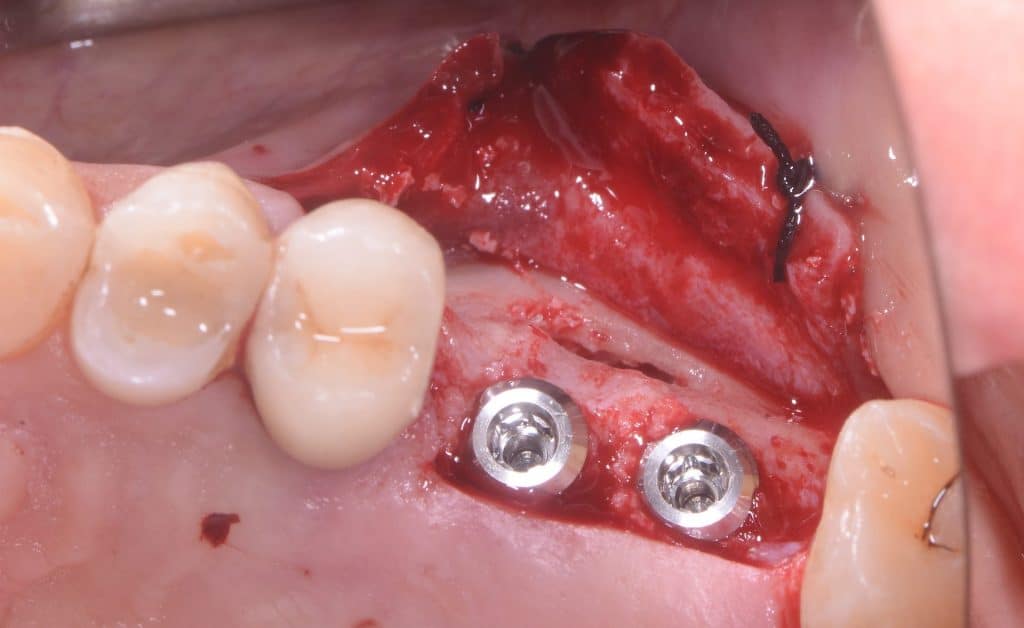
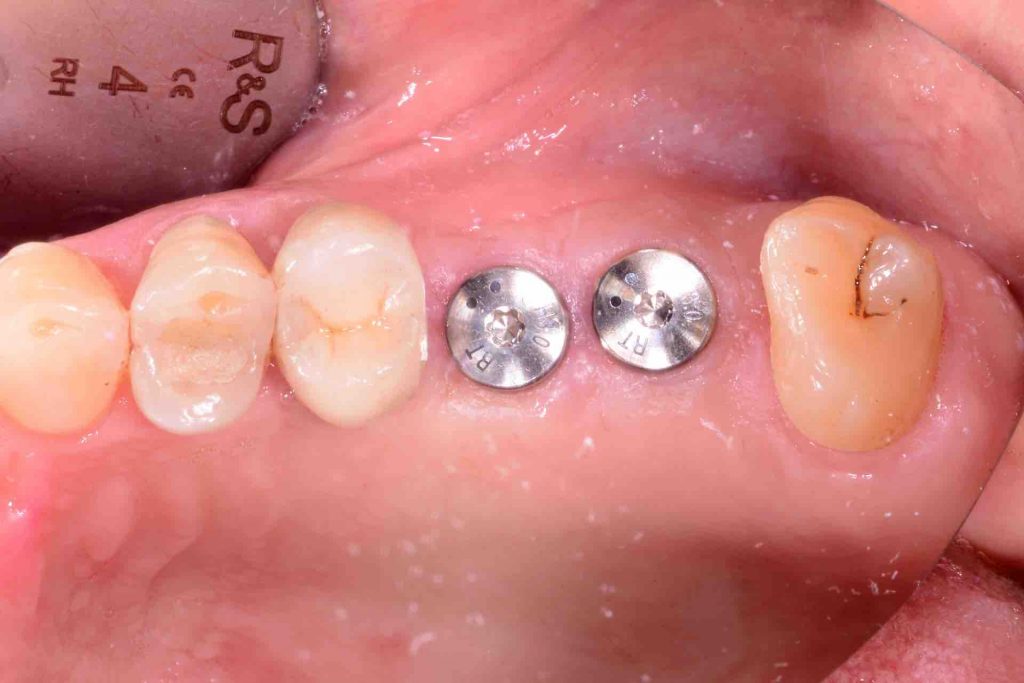
occlusal view, implants placed
BioGide application
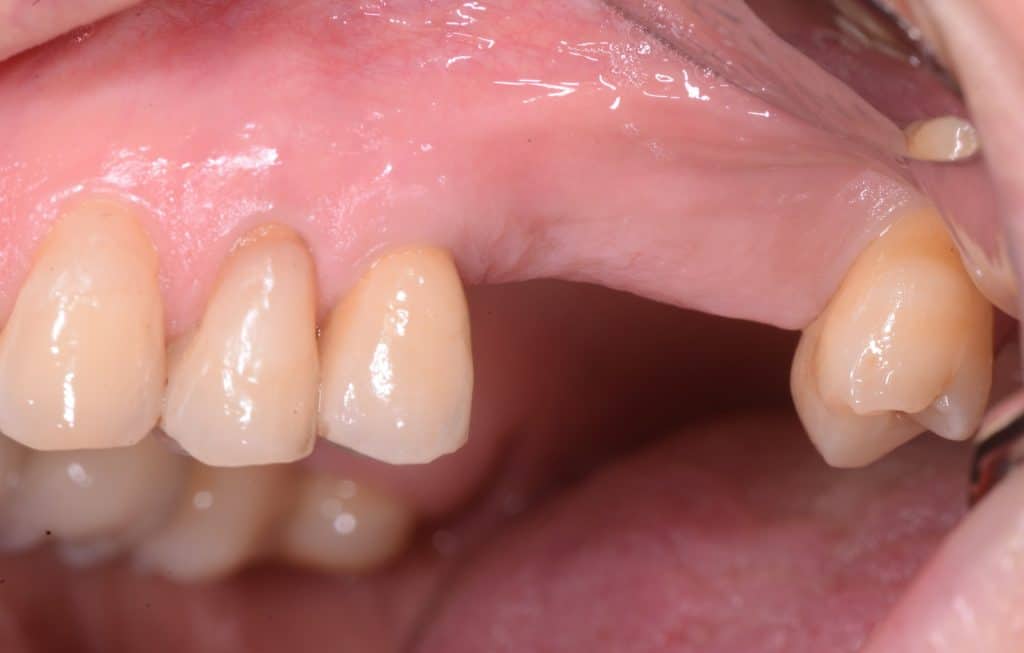
After suturing
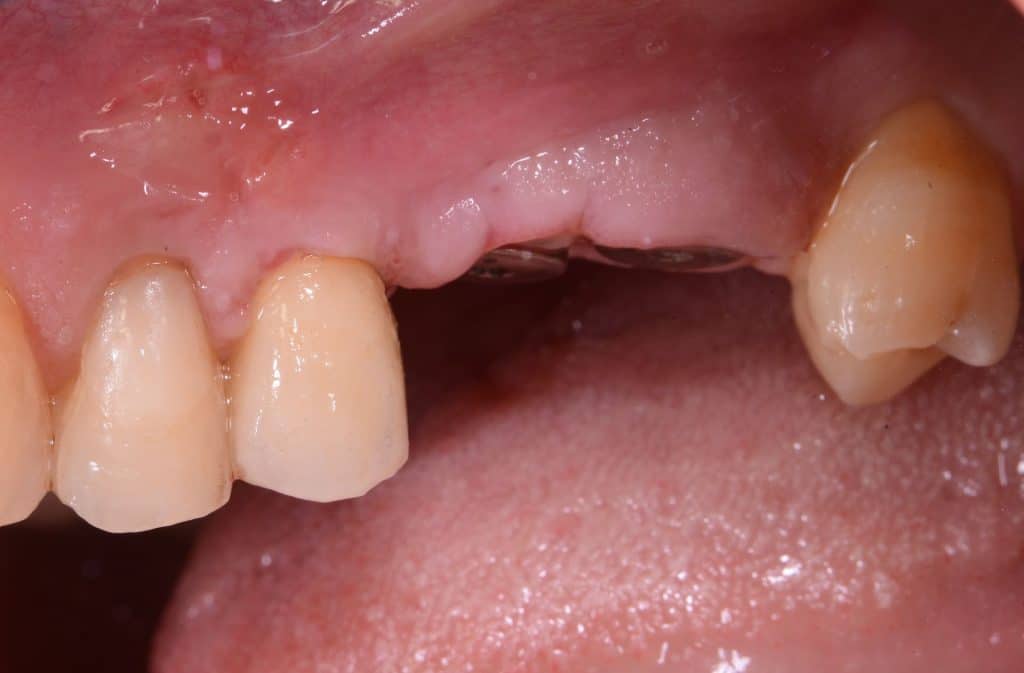
7-days healing

panoramix x ray view, post-op
axial view

1 week follow-up

Before & After
CBCT control
one month follow-up
one month follow-up
Share on: