A 54-year-old female patient came to the clinic complaining of bad aesthetics and color mismatch in upper anterior restorations along with bleeding gums during normal brushing around the restoration.
After the Case Examination, Periapical X-rays were performed and Endodontic Retreatment was deemed important in such cases after post-removal to Avoid any Further Complications in the future. Further investigation with CBCT radiograph Revealed the post was drilled into the palatal wall of Tooth #10 with no sign of Perforation of the palatal wall in coronal 1\3 of the root canal
Crown Cutters By SS White were used to cut into the old PFM restoration and removal of amalgam core and the Brass post was exposed fully ready for the next step.
Under Rubber Dam Isolation Along with Ultrasonic Endodontic Tips and 25X Microscopic Magnification was Used to negotiate around the post and allow for the least amount of tooth structure to be removed.
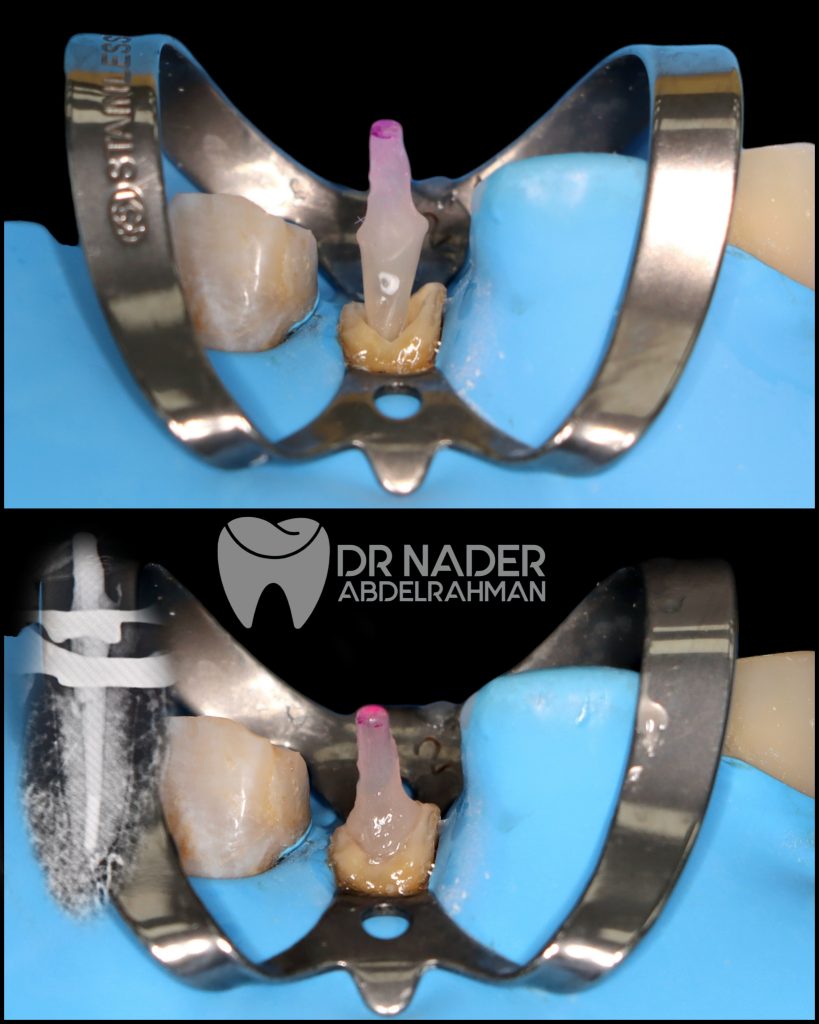
Endodontic Retreatment was Done by Reaching Size 40\4 Master Cone and Obturation with Bioceramic sealer by WellRoot Prevest using Warm Vertical Compaction Technique at 150C. Only 7mm Of Guttapercha was left at the apical part of the root for ensuring a complete seal and ready for Post Drilling.
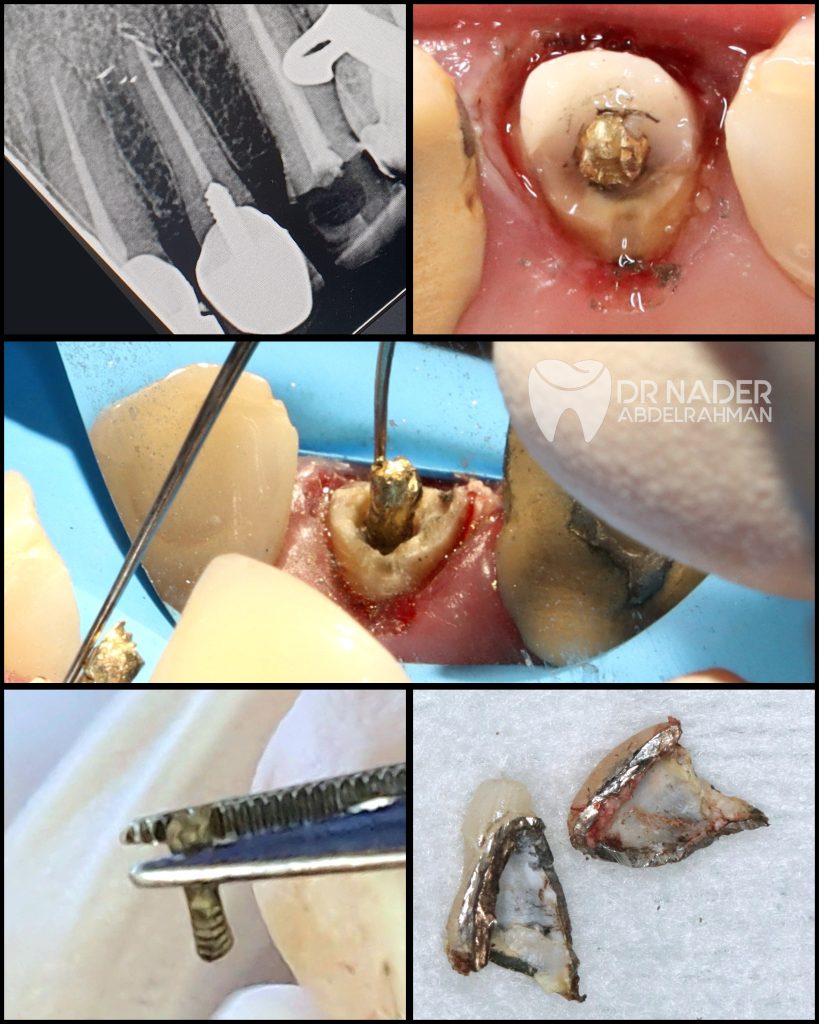
Removal Of Post and Splitting Old PFM Crown with Cutting Burs

Step 1: Fiber Post Drilling Using Standardized One Step Drill Provided by the Manufacturer of the Fiber Post.
Step 2: Checking the Post Height and Fit inside the canal Along with Xray to Confirm Minimum 3-5mm Apical Seal of Obturation Material.

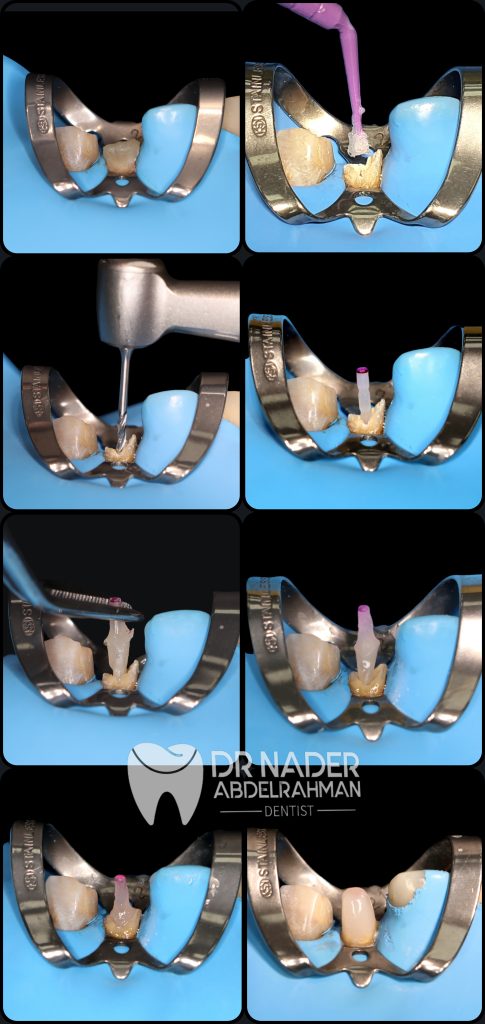
Step 3: Application of Separating Medium then injecting Core buildup Material into the Canal Along with Post Insertion After Cleaning with 37% Etchant and Silanation
Step 4: Tack Cure the Core Material and Post to Remove as One Piece from the Irregularly Shaped Canal
Step 5: Finishing of Custom Post from Fitting Surface is a Crucial Step to allow room for Cement Line
Step 6: After Canal Cleaning from Remance of Glycerine using NaOH irrigation and 37% Etchant to remove any Oily Residue. Univeral Bond is Applied in Accessible Areas with Curing Light Source and Cured for 40 seconds. After Silanation Of fitting Surface, Resin cement Self Adhesive Dual Cure was used to Cement the Custom Post Permanently.

Step 7: Nanohybrid Composite was Used to Buildup remaining Core and Raised up to Adequate Height ready for Preparation.
Step 8: Final Preparation Design with Subgingival Finish line and retraction Cord Applied Throughout the prep.

Step 9: Impression was Taken while Retraction Cord Still Applied and Impression Material of Choice was polyvinyl siloxane For Maximum Accuracy and Stability.
Step 10: Cementation Of Bilayerd Zirconia Crown BruxZir. MDP primer was Added into Fitting surface for maximum Bond Strength.
Steps Overview. Thank You for Reading.
Share on: