Phase I: Endodontic Retreatment and Foundation
1. Isolation and Pre-operative Assessment
-
Rubber Dam Isolation: The procedure began with strict isolation using a rubber dam to ensure an aseptic field.
-
Pre-operative Radiographs: Pre-operative periapical radiographs were taken to evaluate the existing treatment, identify the cause of failure (poorly condensed gutta-percha/inadequate obturation), and assess the periapical status.
2. Access and Gutta-Percha Removal
-
Access Cavity Preparation: The existing restoration was removed, and the access cavity was refined.
-
Gutta-Percha Removal: The old gutta-percha was successfully removed using the Neoendo Retreatment System , ensuring thorough debridement of the root canal system.
3. Root Canal Instrumentation and Obturation
-
Re-instrumentation: The canals were re-instrumented and shaped using the Neoendo S Rotary File System, following the manufacturer’s recommended sequence to achieve the desired taper.
-
Irrigation: (naocl+edta+chx).
-
Obturation: The canal was dried, and obturation was performed using Bioceramic Sealer in conjunction with the Single-Cone Technique, ensuring a hermetic seal.
-
Post-Obturation Radiograph: A final radiograph was taken to verify the quality and length of the obturation.
Phase II: Core Build-up and Vertical Preparation (BOPT)
4. Post-Space and Core Foundation
-
Fiber Post Cementation: After preparing the post space, a Fiber Post was cemented using a dual-cure adhesive cement.
-
Core Build-up: The coronal foundation was built using EverX flow Core to establish initial coronal integrity.
5. Vertical Preparation and Biological Width Management
-
Ferrul Management: Due to the absence of a substantial ferrule, the case necessitated a Vertical Preparation utilizing the Biologically Oriented Preparation Technique (BOPT) philosophy.
-
Preparation: The tooth was prepared vertically using specialized diamond burs (specify type/head if possible) to create a knife-edge/edgeless preparation, extending slightly into the sulcus.
-
Osteotomy : To ensure proper biological width and tissue health, a Closed Ostectomy (minor osteotomy) was performed at the time of preparation to establish a stable and healthy sulcus depth for future margin placement.
Phase III: Healing, Final Impression, and Delivery
7. Final Prosthetic Delivery
-
Final Scan: After the healing period, the provisional was removed, and the final impression was captured using an Intraoral Scanner
-
Crown Fabrication: The final crown (specify material, e.g., Monolithic Zirconia/Lithium Disilicate) was fabricated.
-
Delivery and Cementation: After a short turnaround time of 4 days, the definitive crown was delivered, verified for marginal fit, occlusion, and aesthetics.
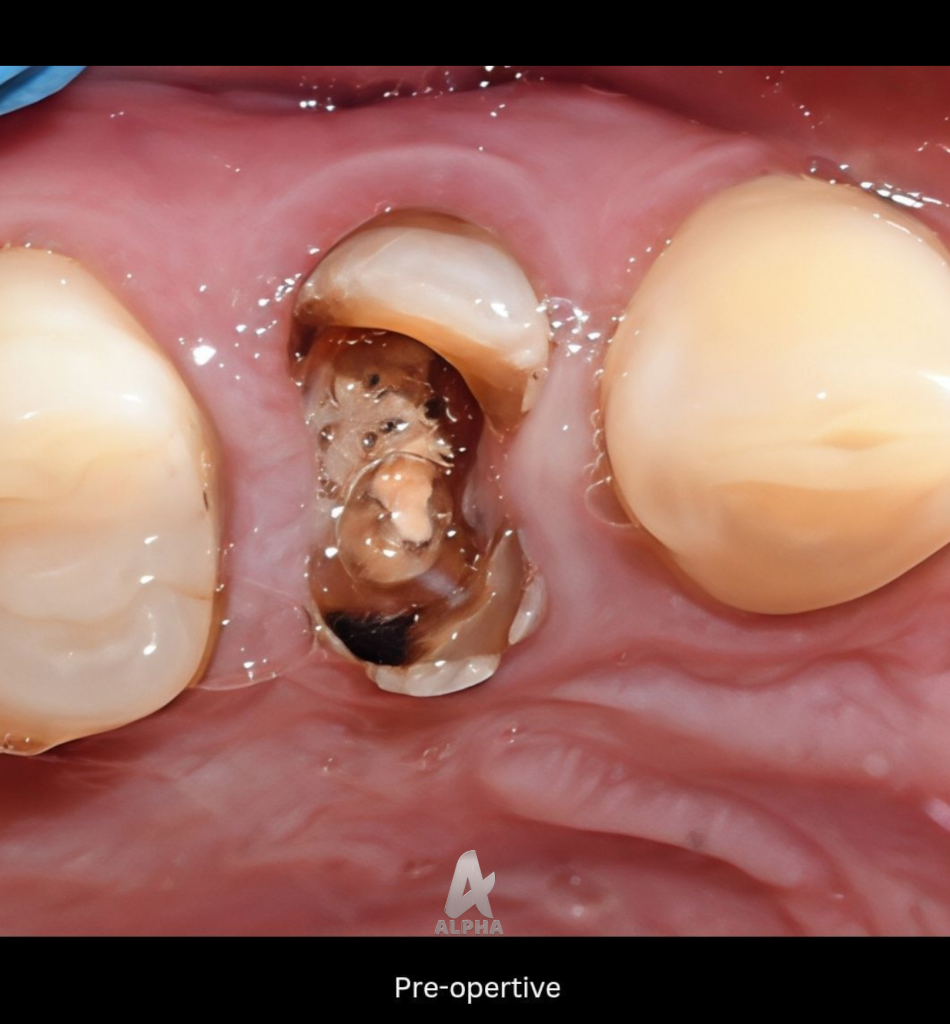
pre operative situation
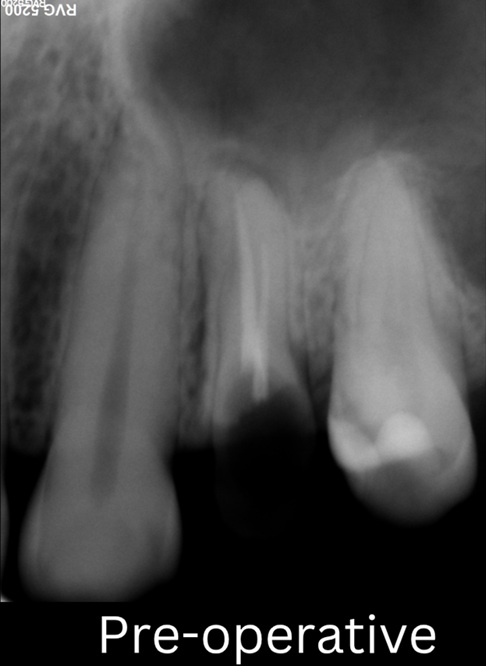
pre operative xray demonstrating the poor g.p and a p.a lesion
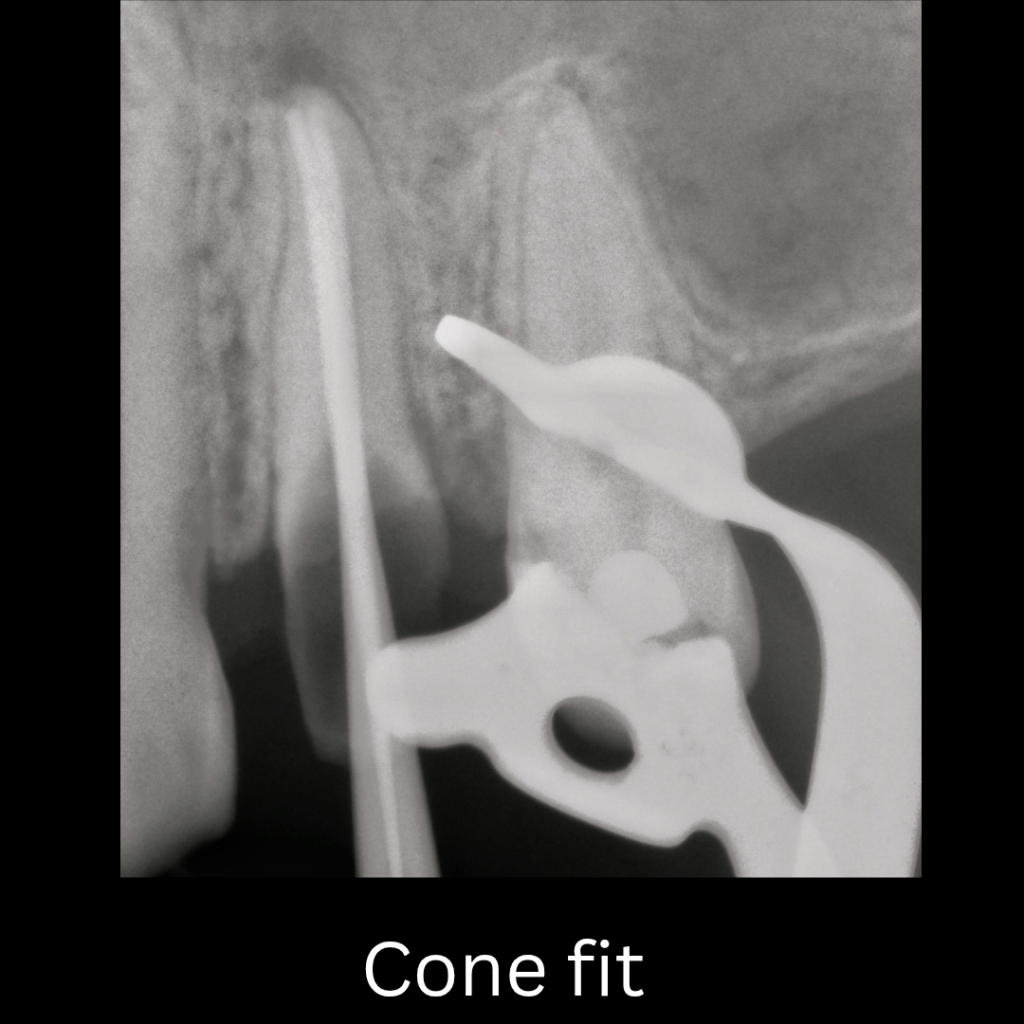
cone fit after doing the complete cleaning and shaping
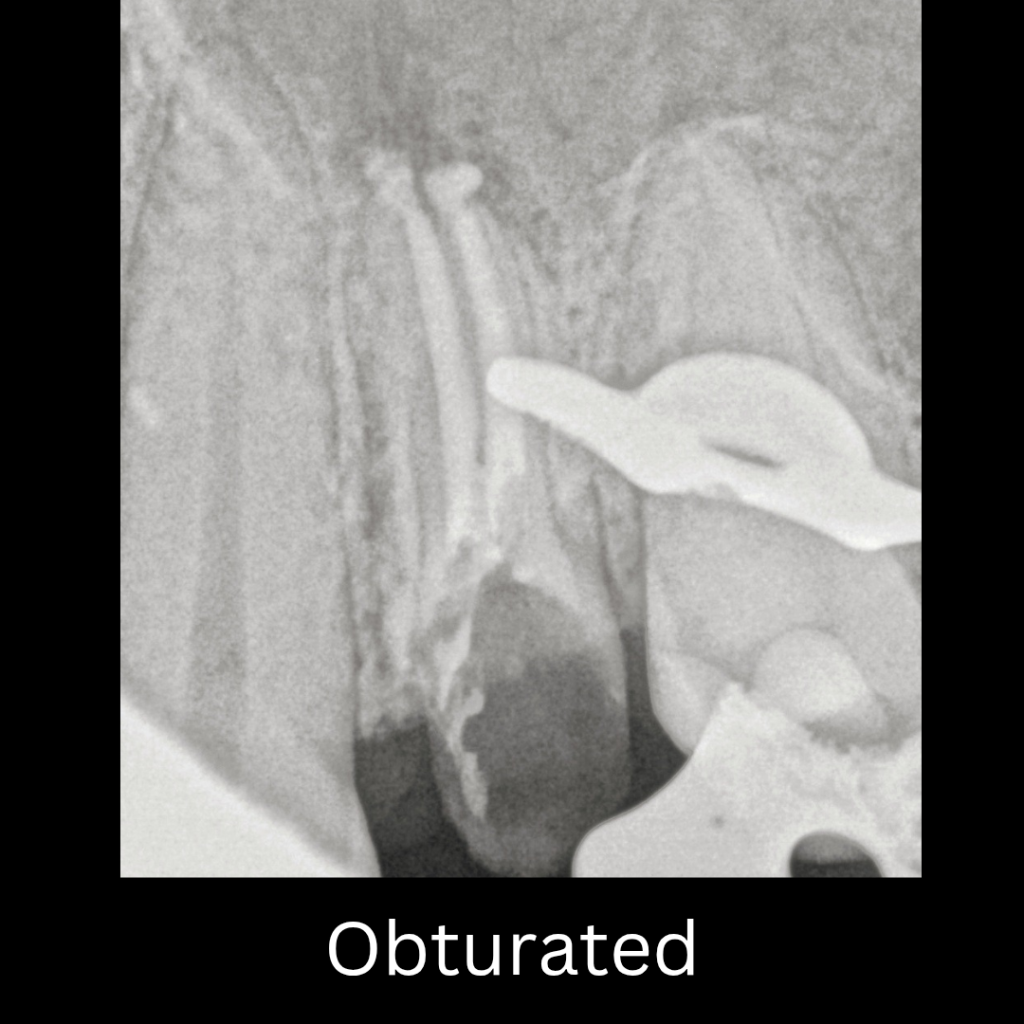
obturation done using bioceramic sealer and single cone technqiue
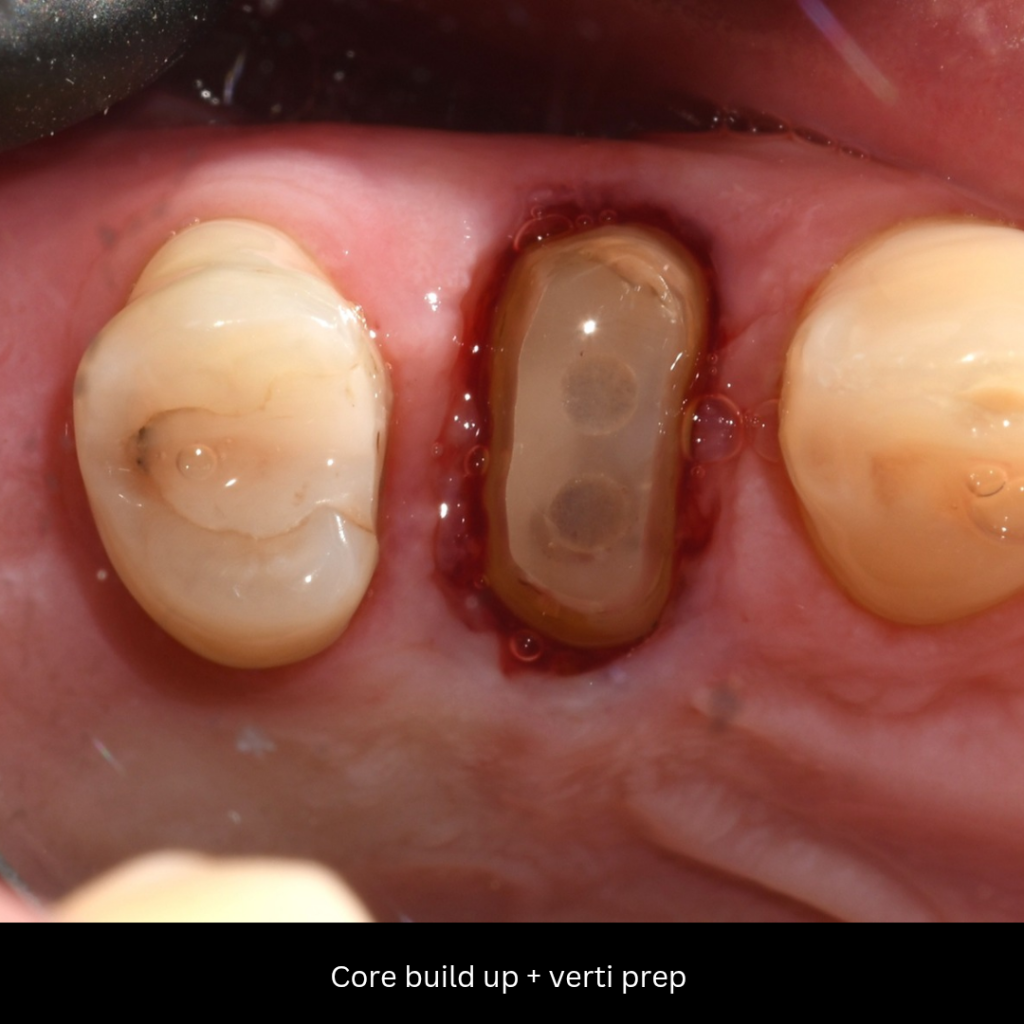
fiber post with ever x core
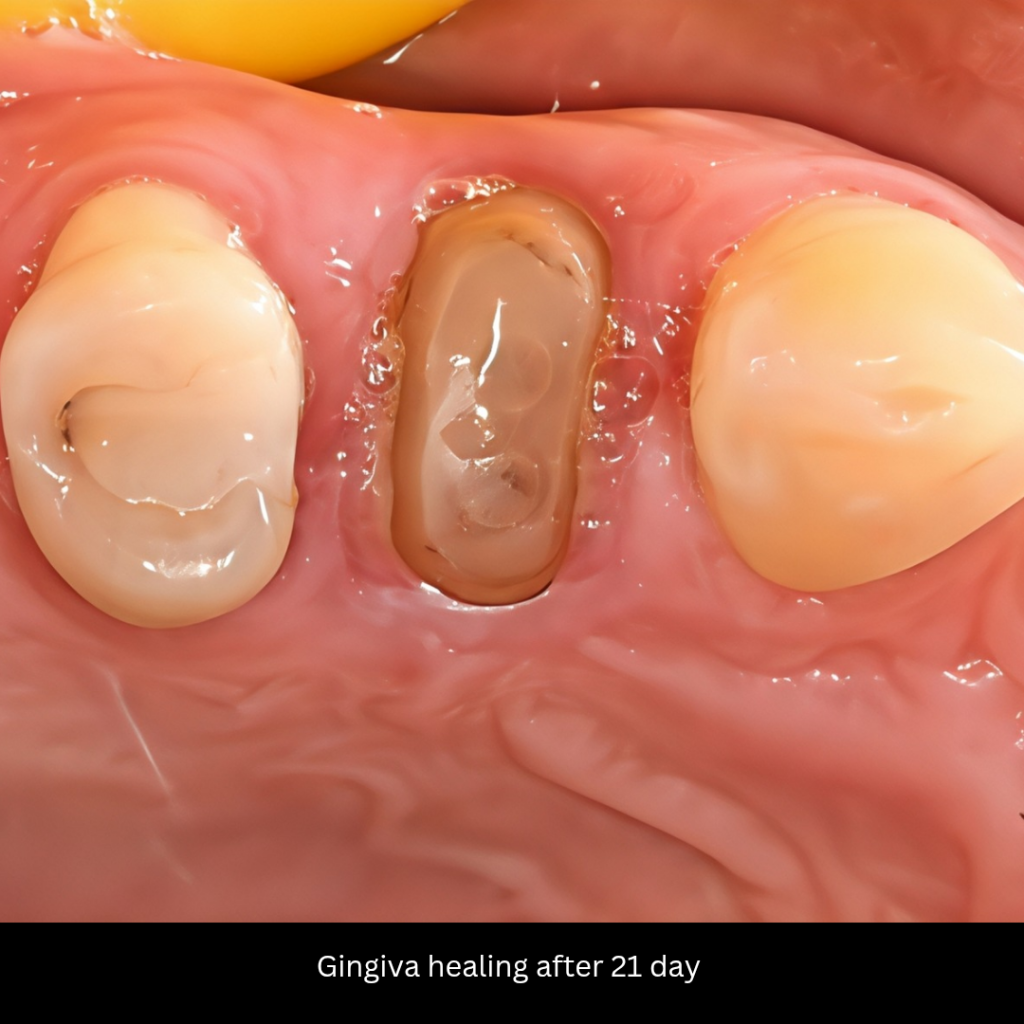
after 21 day complete healing done
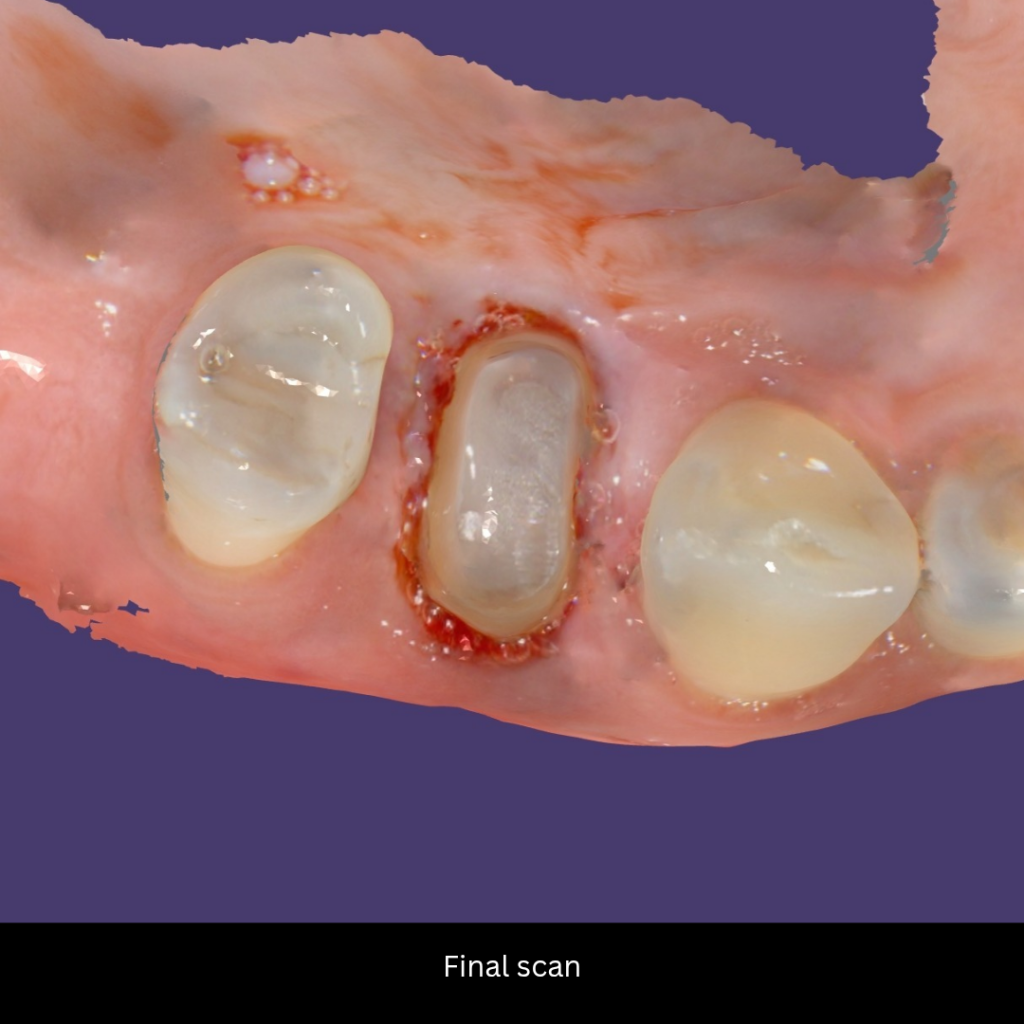
final scan
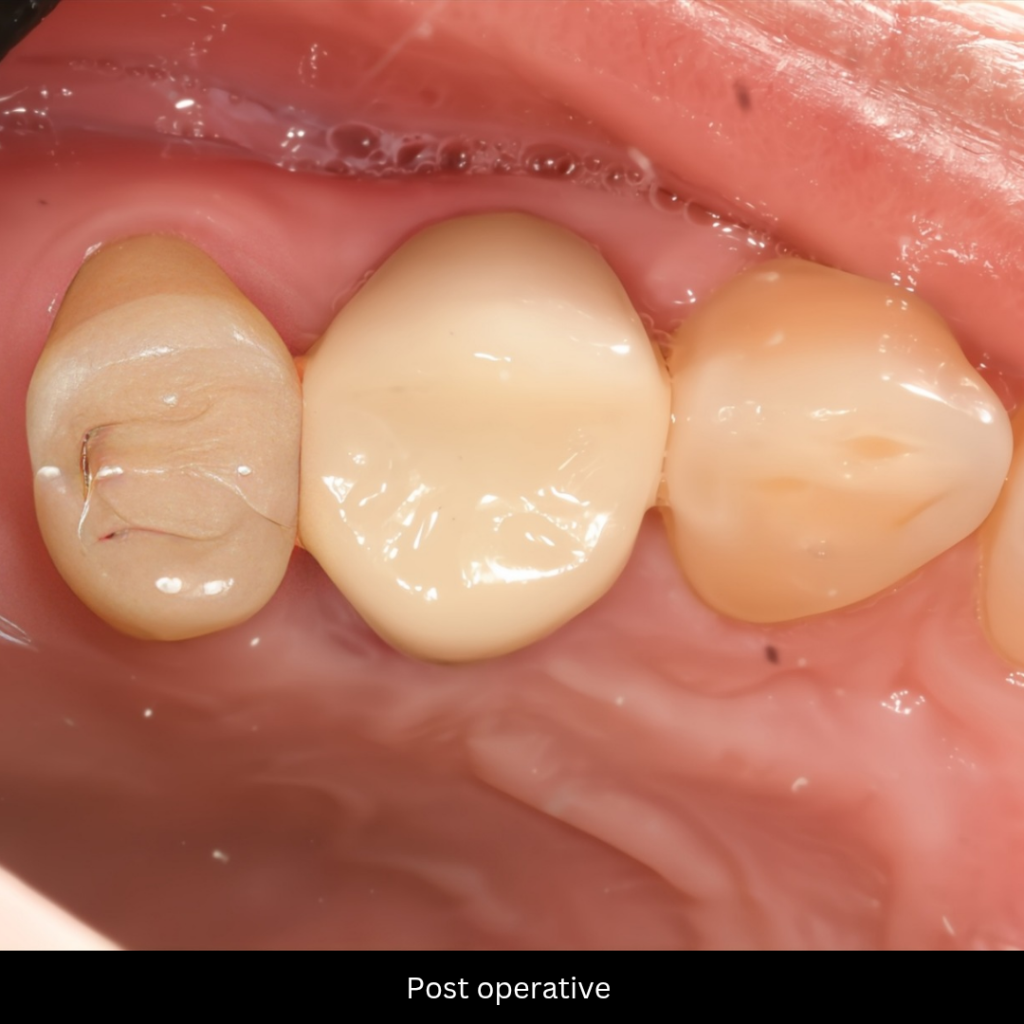
post operative zircon crown

before and after
Share on: